
Page Contents
This is the second post in our series explaining common mistakes and animal guard failure modes.
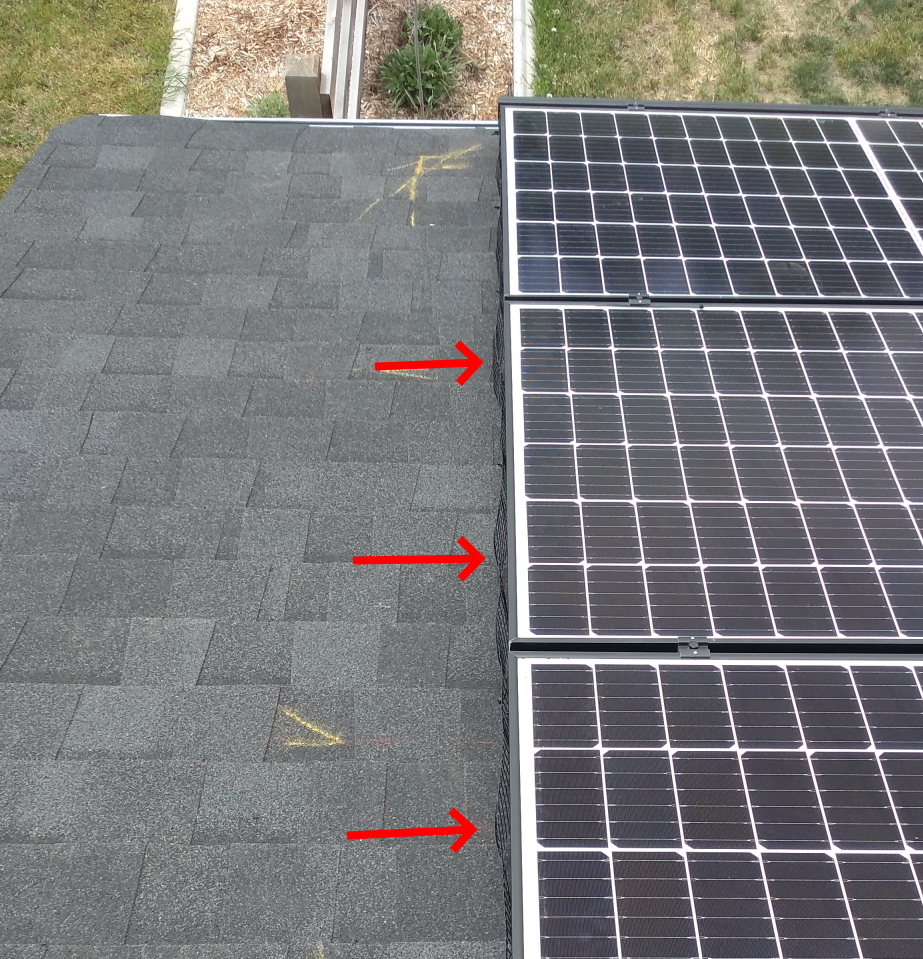
When it comes to installing solar animal guard, the old saying applies: Do it right or do it twice. There is nothing worse than spending the time and money to install critter guard, only to have an animal sneak in and build a nest anyway. This can happen if the installer leaves too large of a gap between the fencing and the roof/array, creating an incomplete seal.
Maximum Gap Size
To prevent this from happening, solar contractors should maintain a clear, company-wide standard of 1/2″ maximum gap between wire mesh and other objects (such as the roof, PV modules and protruding rails or conduit). 1/2″ matches the wire spacing of industry standard wire mesh, which has proven effective at blocking small critters.
You may be wondering if animals can get under the PV array through the gaps between the solar panels themselves. These gaps are determined by the racking system used to attach the panels to the roof, and can be as large as 1″ (for UniRac SolarMount). Though many rodents can squeeze through a 1″ gap, we have yet to hear a report of this happening. Please share in the Comments if you have observed otherwise!
Now let’s take a look at some violations of the 1/2″ rule and see how they could be avoided.
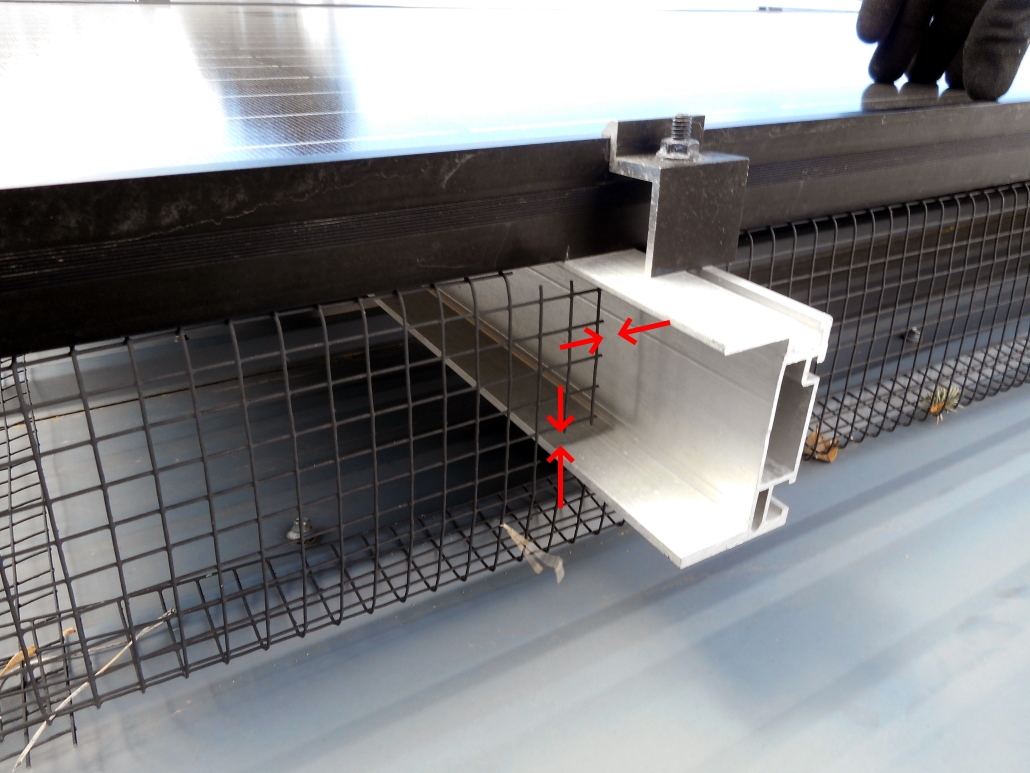
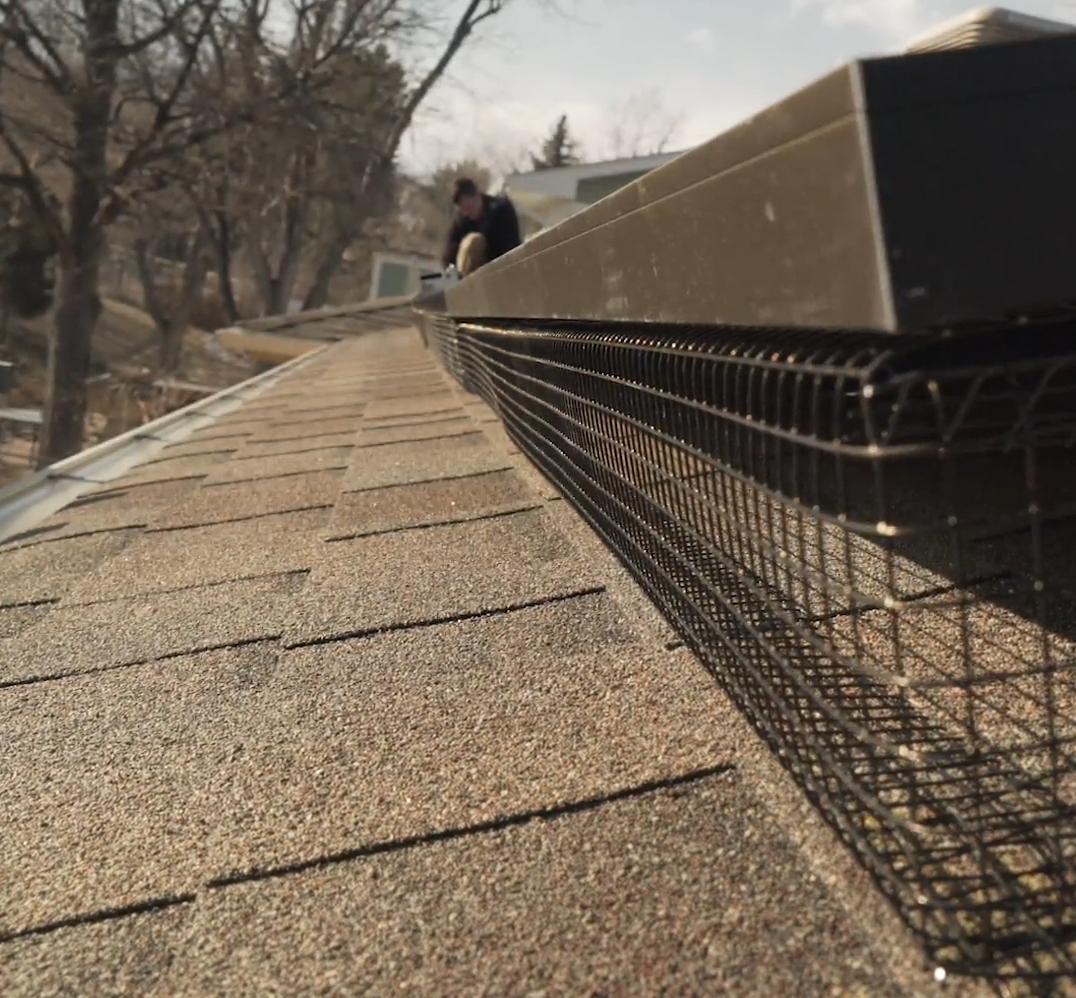
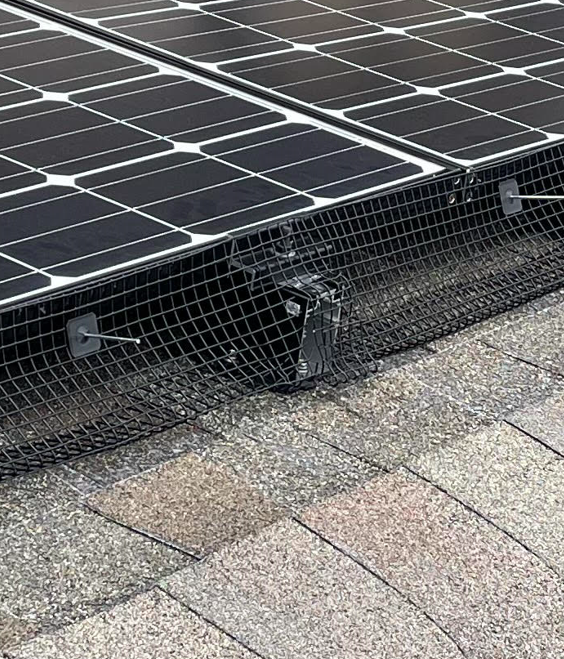
Rail & Conduit Penetrations
90% of rooftop solar systems have some sort of object(s) sticking out from the array around the edges, such as rail ends, conduit, roof vents and junction boxes. These interrupt the uniform gap between roof and array, and must be worked around when installing animal guard.

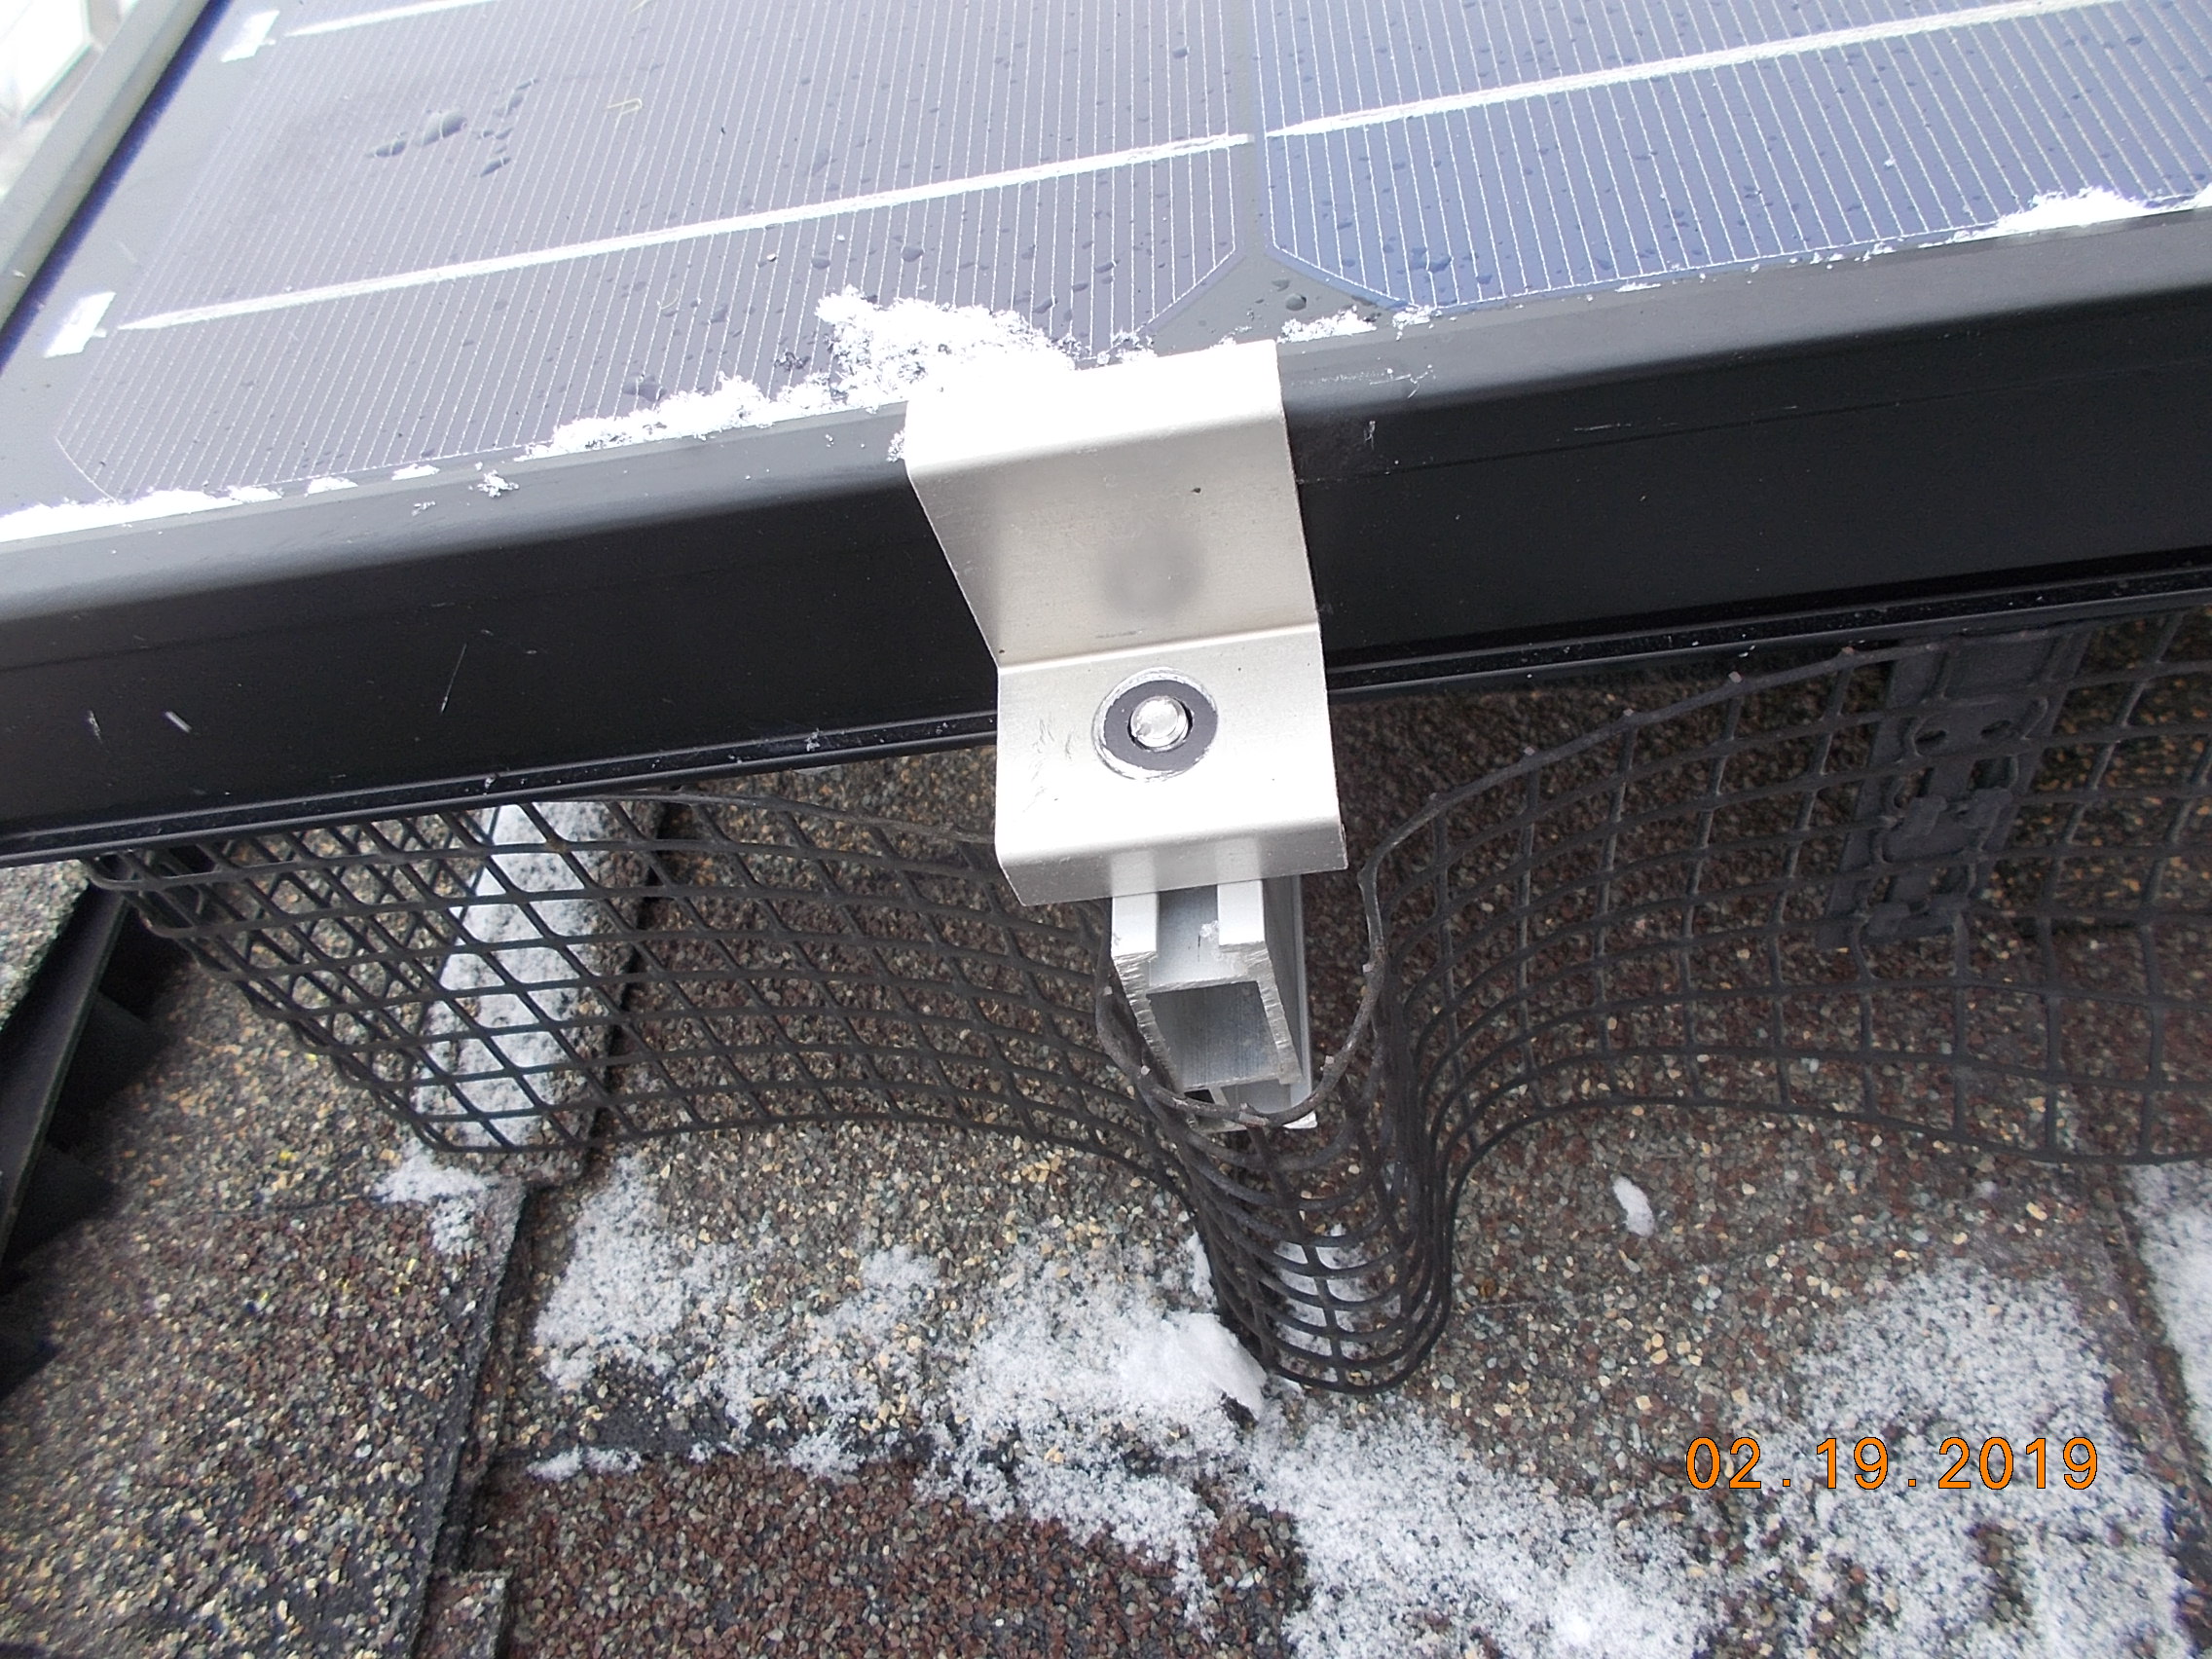
In the photo above, the wire mesh is cut and attached to each side of a rail. Obviously, this leaves a huge gap under the rail. The mesh is also poorly supported and could be peeled back by a rodent. Below is another shoddy approach to rail ends that failed and led to pest incursion.
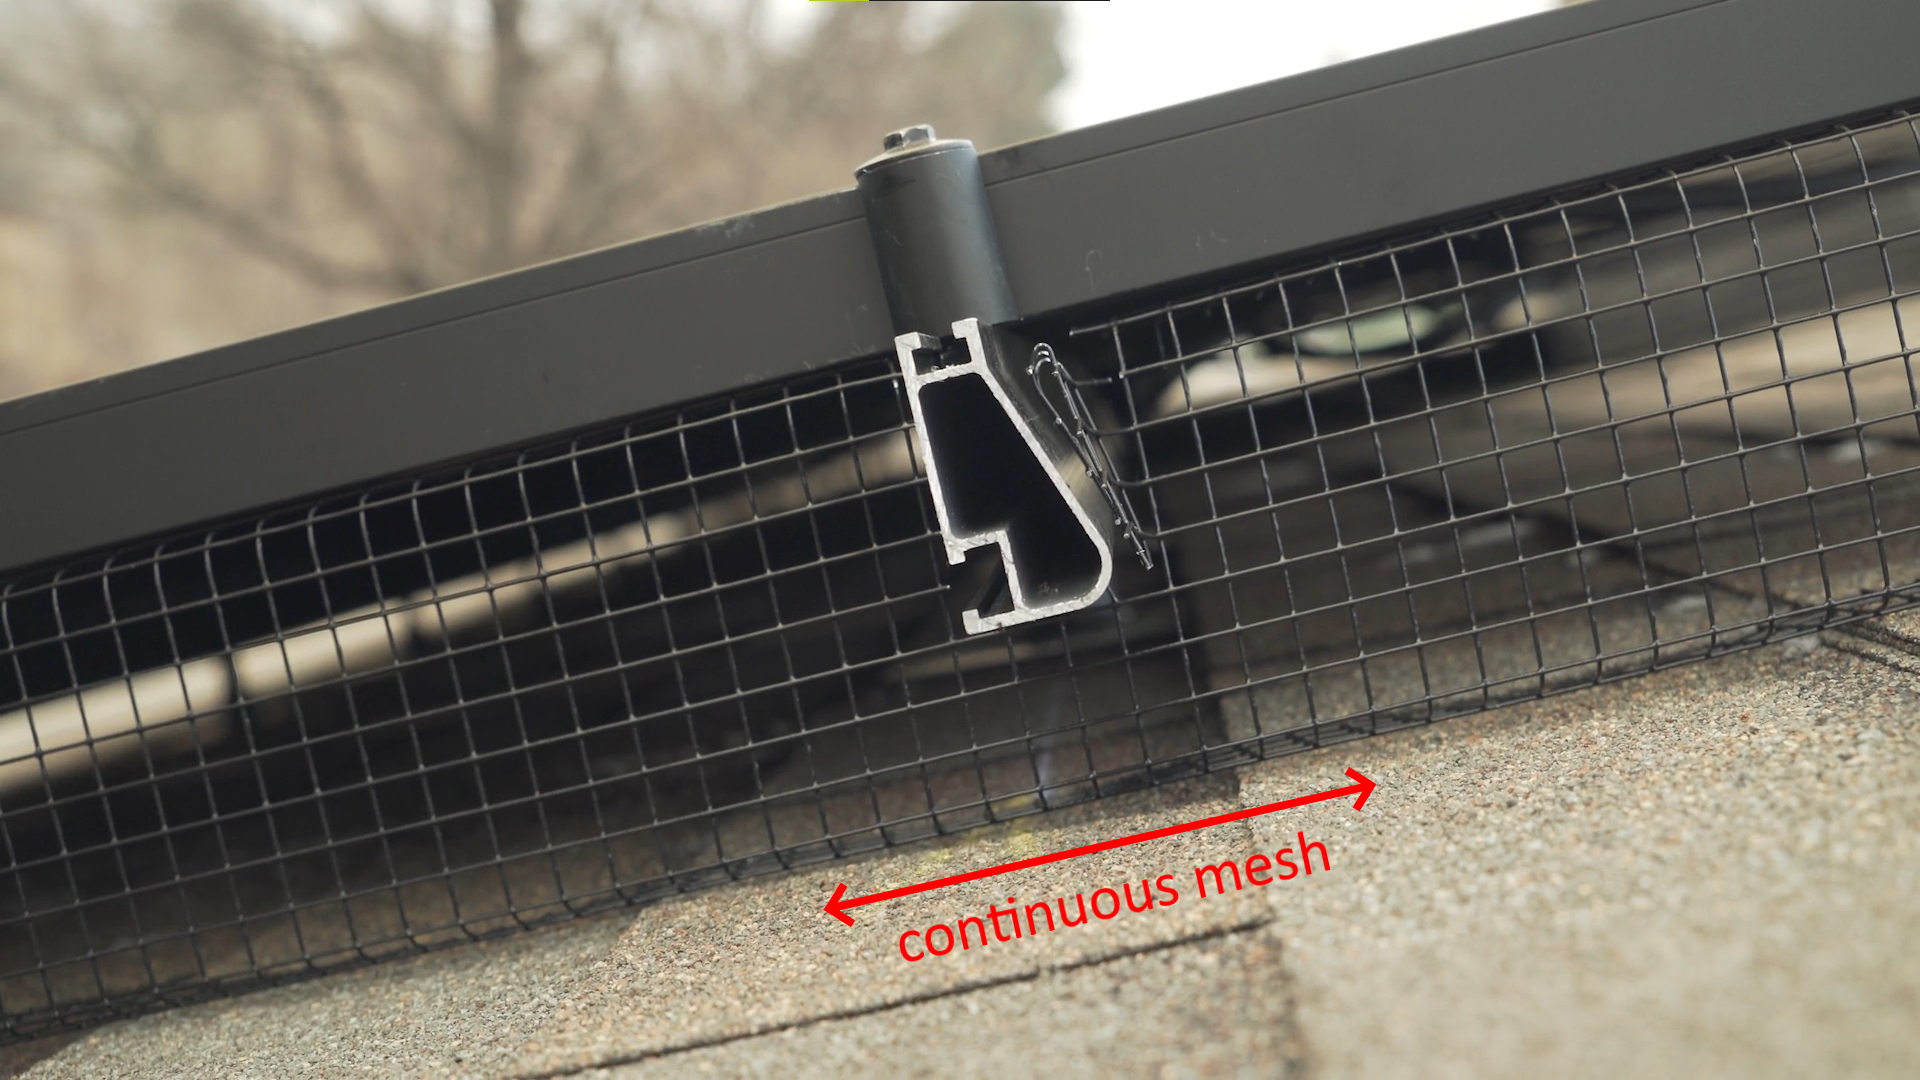
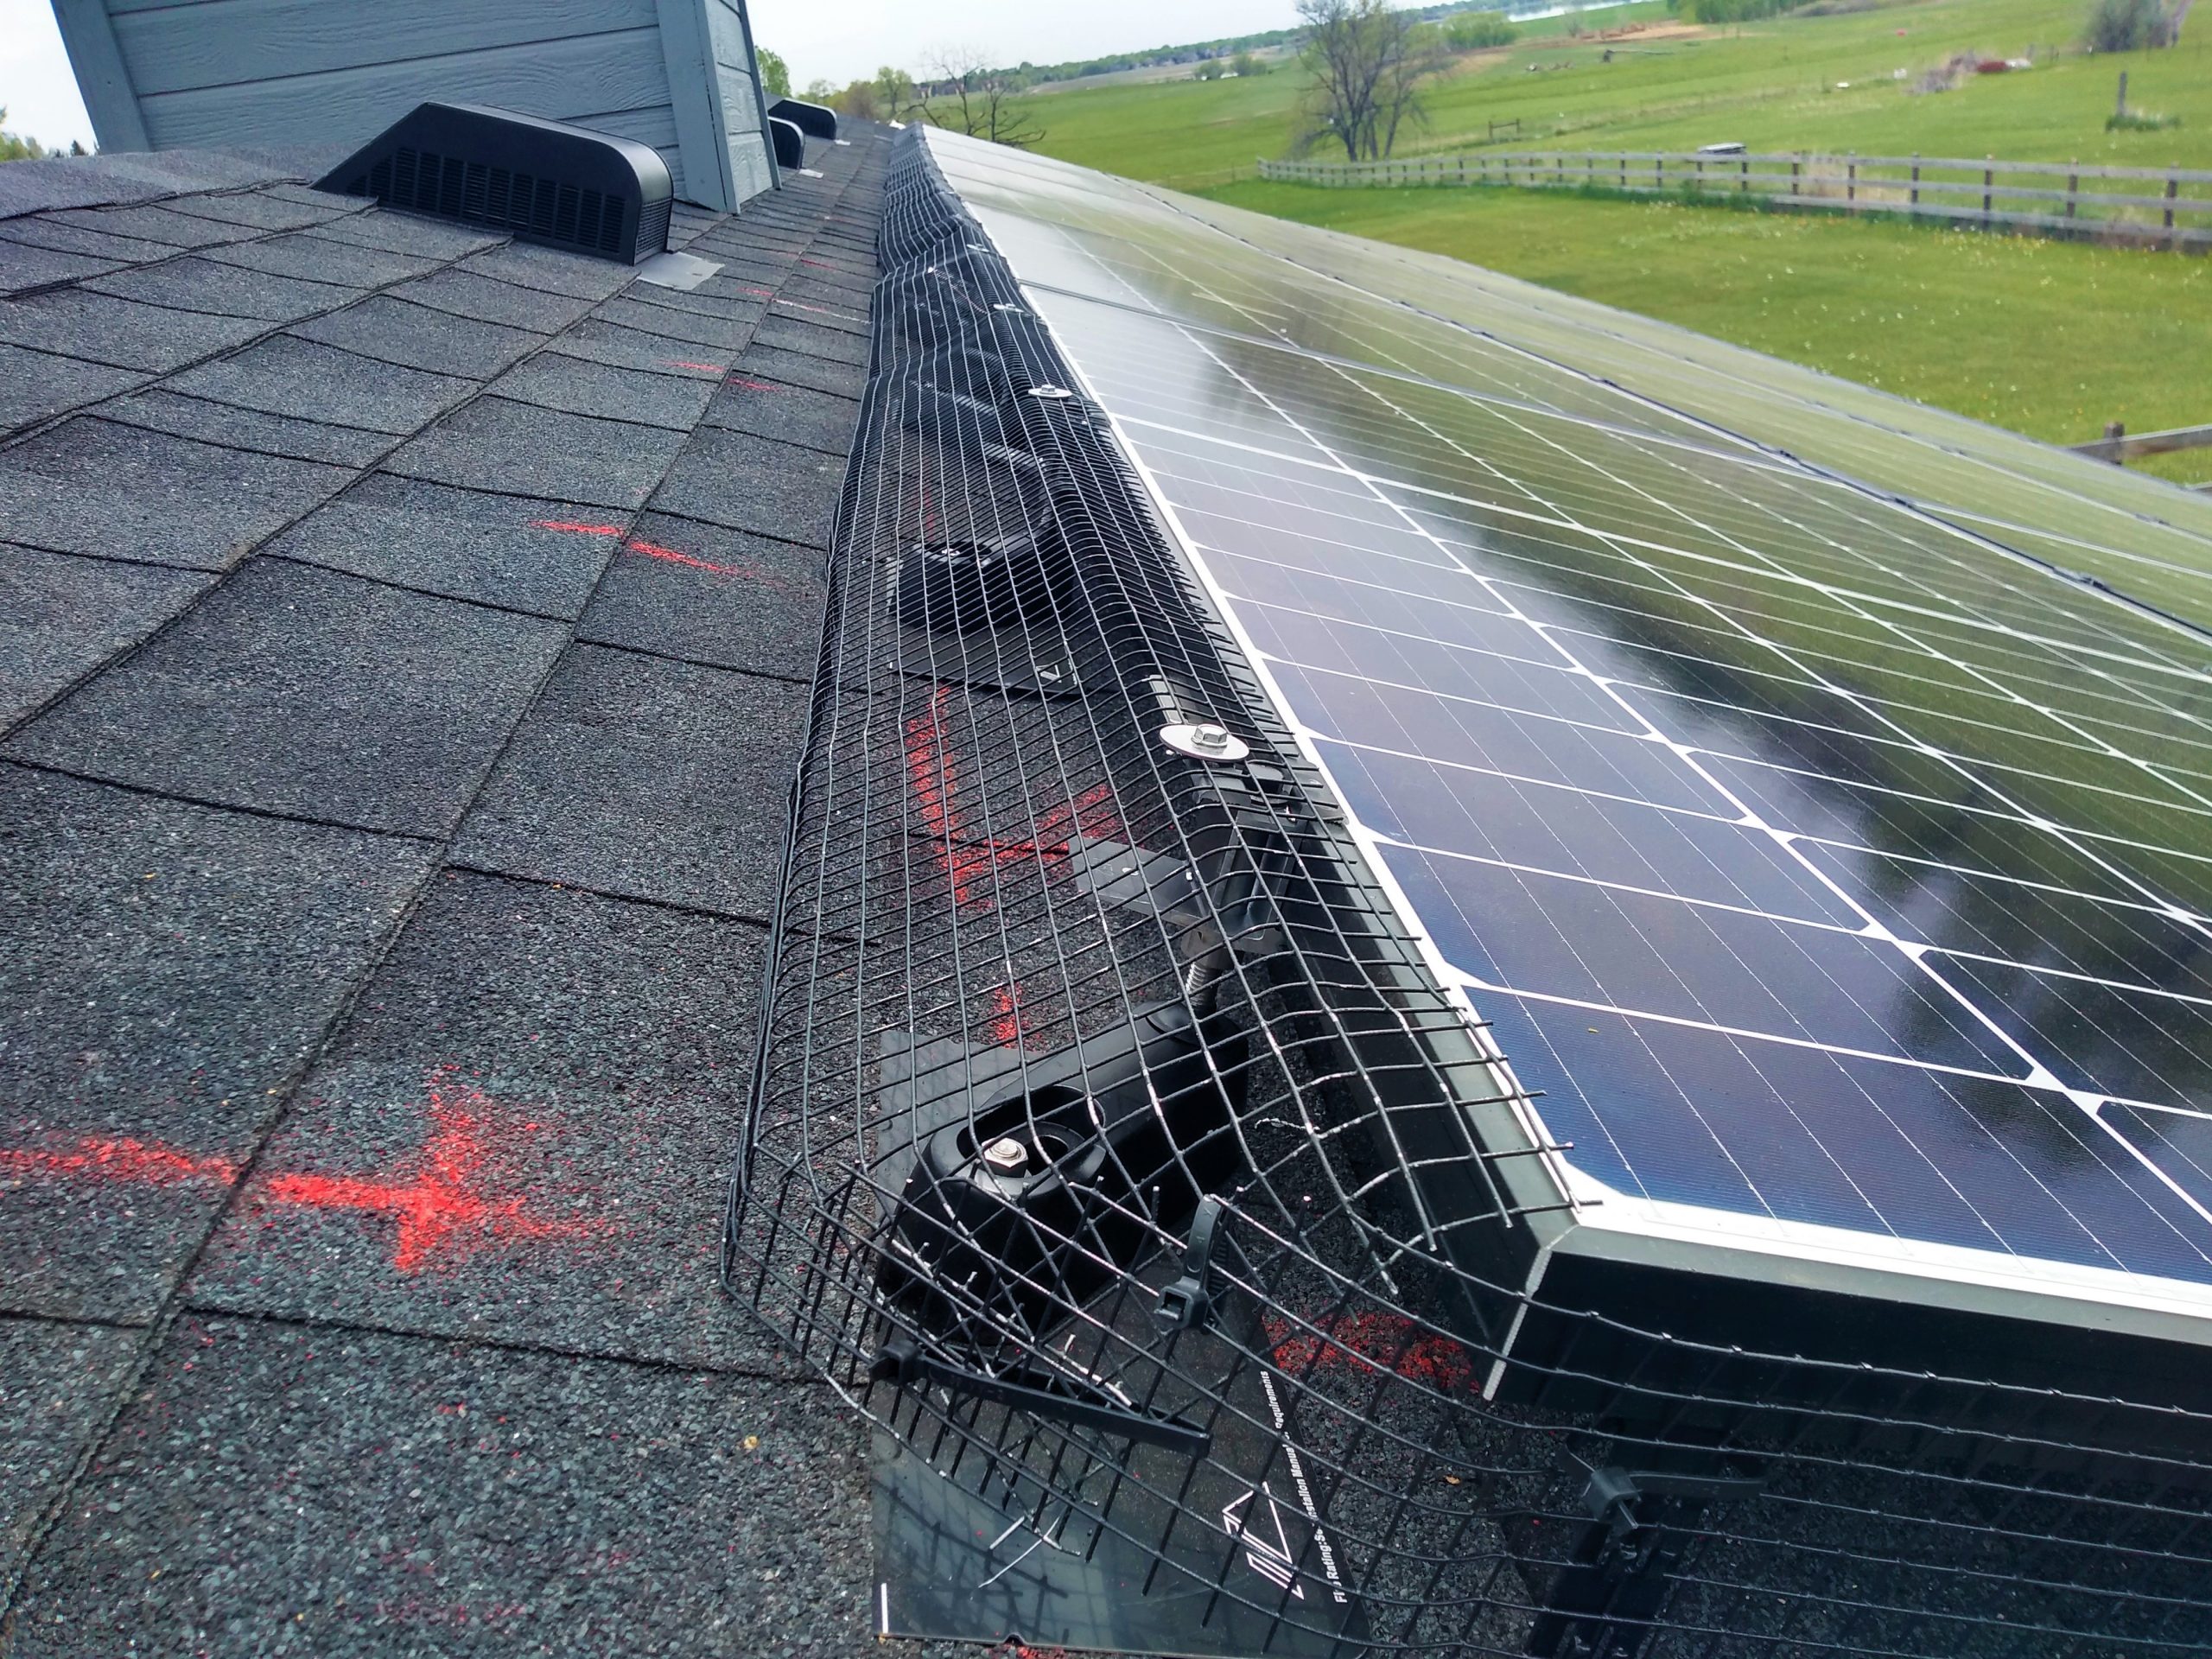
Solution
Cut small “windows” around penetrations and leave the mesh as intact as possible, as shown below in a still from the Rail Mount Method instruction video.
Sometimes you need to cut a slit in the mesh to fit around a piece of conduit. After installing the mesh, Be sure to “stitch” the slit back together with hog rings or metal (never plastic) zip ties.
Flat & Floppy Wire Mesh

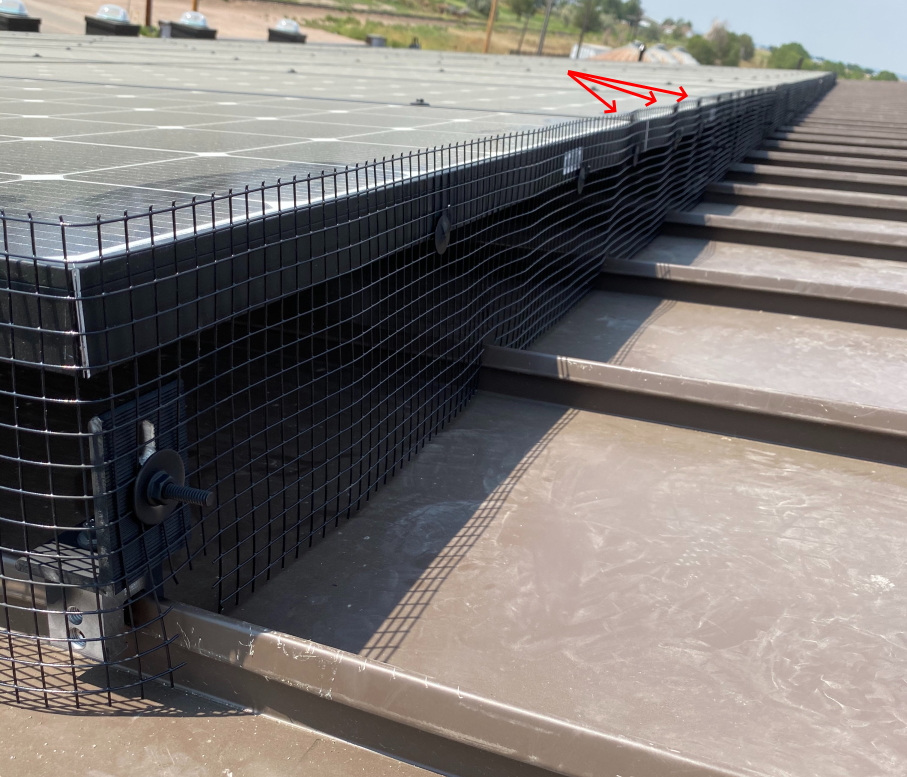
When wire mesh is installed as a flat piece of material with no bends in it, it is floppy and unstable. This presents three problems:
- The mesh tends to be “wavy” after being installed, creating unacceptable gaps.
- The waviness looks unprofessional.
- When flat, the mesh has no rigidity and can be peeled back or pushed in easily by snow and critters.
This video clip illustrates the third point:
Solution
Crease the wire mesh into an L- or C-channel before fastening it in place. This gives it 3-dimensional stability and eliminates waviness.

“C” Channel “L” Channel

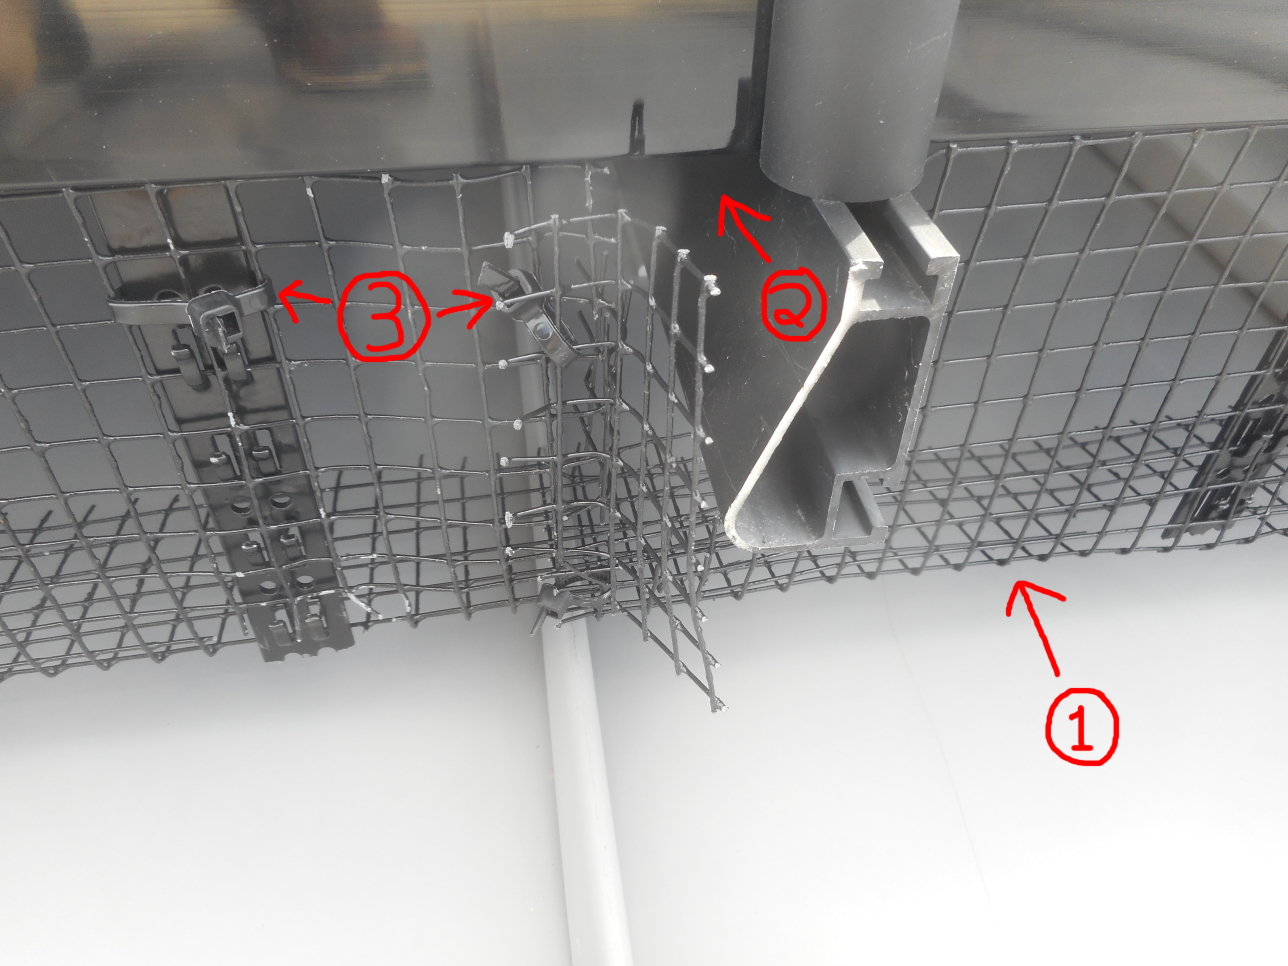
Railless racking systems
“Railless” racking systems are intended to speed PV system installation and use less materials to reduce costs. Unfortunately, they make it particularly difficult to keep pests out from under the solar array.
Roof Tech’s E Mount AIR and Apex products require short, hollow aluminum channels to be installed around the array perimeter. Unfortunately these act as “rat tunnels” and are difficult to seal as shown below.
Zep (now owned by Tesla) and IronRidge FX are two other railless racking systems that pose a similar problem due to their irregularly-shaped roof attachments protruding from under the array.
Solution
The best solution we’ve heard of for sealing these systems is to build an external “cage” around any hardware protruding from under the array.
While this method works, it is not as secure or discreet as a C-channel tucked under the array. The wire mesh is out in the open and may be vulnerable to damage by wind-blown branches and snow loads.
Tile Roofs
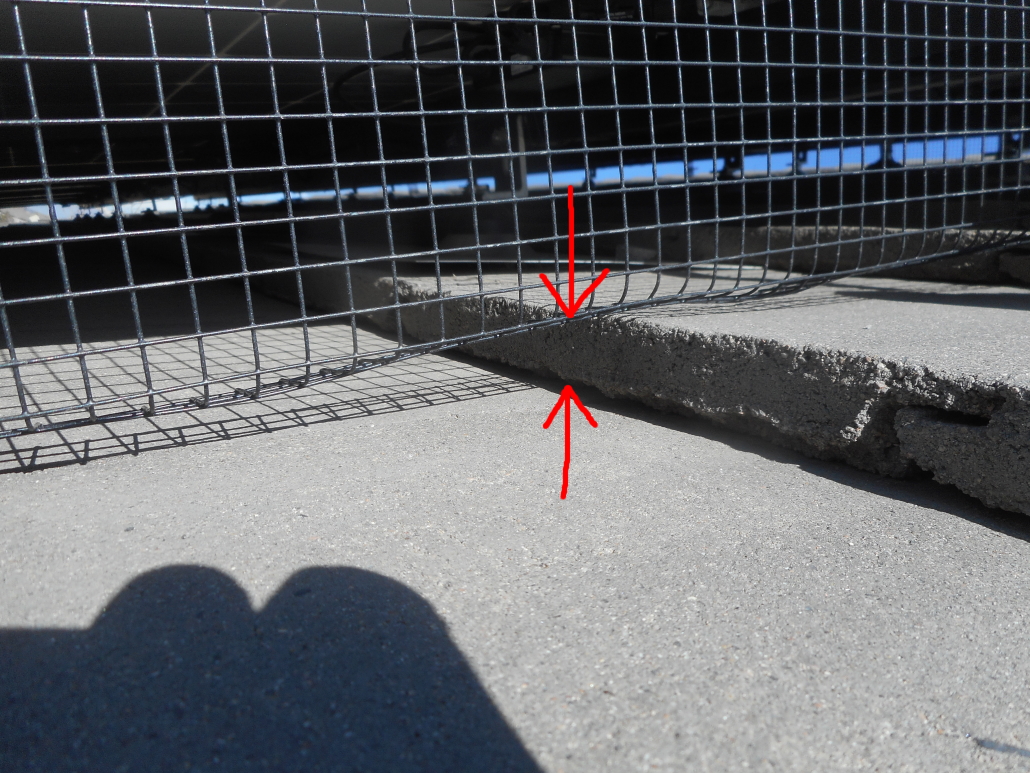
Tile roofs are the bane of every animal guard installer’s existence! Whether they are flat concrete tiles, S-tiles or trapezoidal, tiles create an uneven surface that is difficult to seal. Unfortunately, the only way to seal an array over a tile roof is to cut slits in the wire mesh and bend it to match each step in the tiles. It’s a slow but necessary task; small birds and rodents can and will enter through gaps around tiles.
Solution
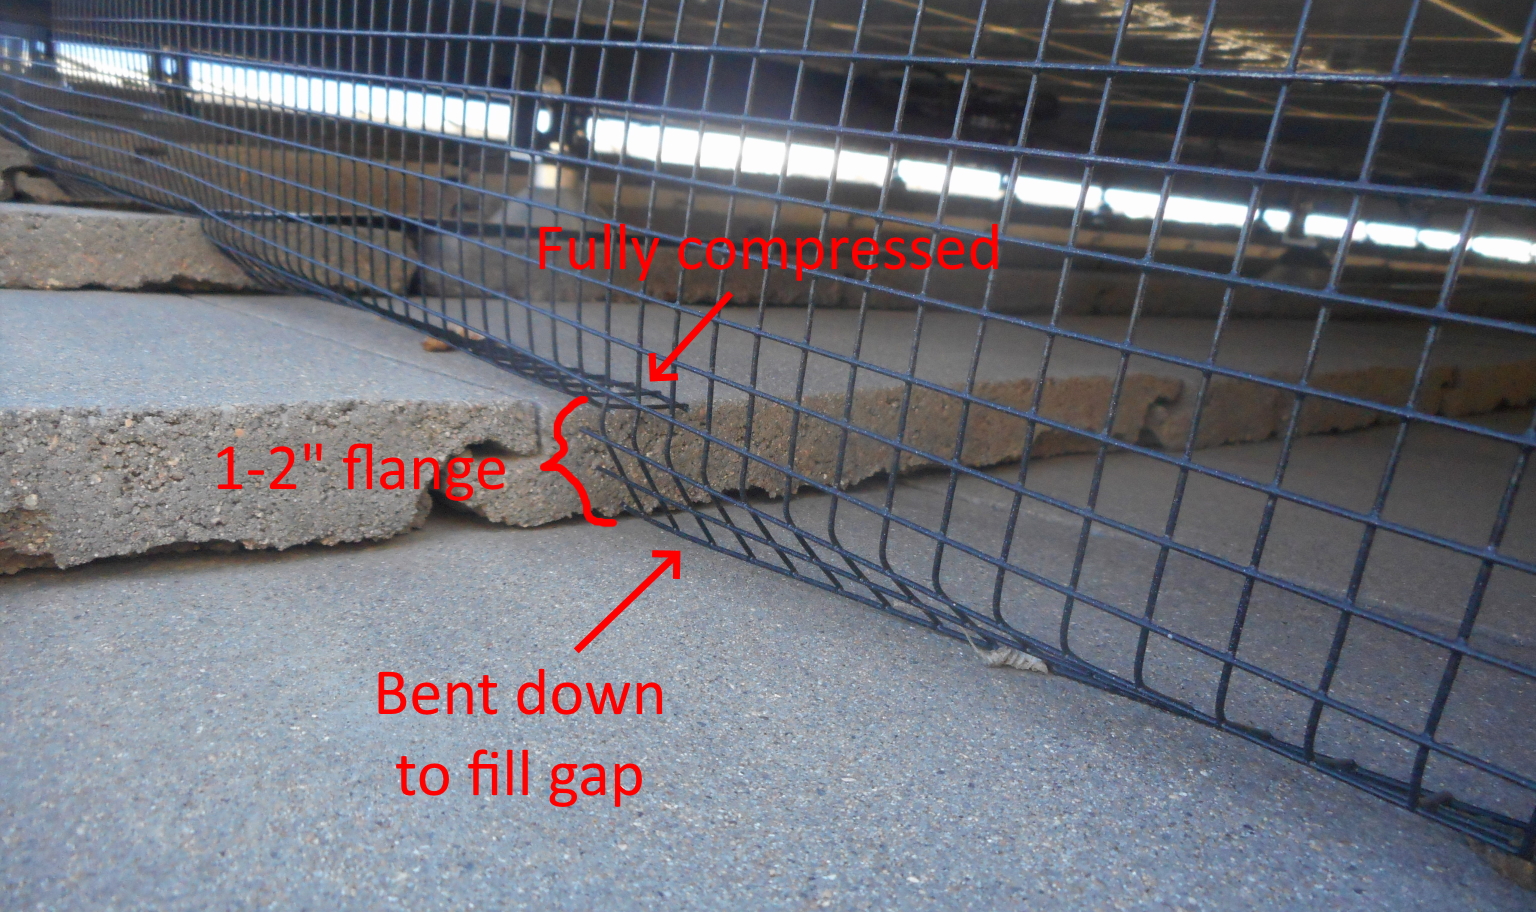
There is one trick that will speed up the process of conforming wire mesh to a tile roof and ensure the best possible seal. Rather than attempting to cut the wire mesh perfectly to match the roof, bend a 1-2 inch “flange” into the wire mesh where it meets the roof. Then cut slits into the flange, and bend the flange down to meet the roof. Bending the flange gives you more room for error in your cuts, as the flange can take up as much or as little space as needed. The flange also lends some rigidity to an edge that would otherwise be floppy and unstable where it meets the roof.
Metal Roofs
PV systems over metal roofs are the most difficult type to seal. As shown in the photo above, standing seams create an uneven surface just like a tile roof– but unlike tile roofs, we cannot allow the wire mesh to touch and scratch the painted roof surface. We don’t know any installers who are 100% confident of their method for metal roofs, and many are refusing to install animal guard over metal. Several companies (including Slick Tools) are working to develop products that address this need; sign up for our email list to be the first to hear about them!
That said, protecting metal-roof PV systems from animal damage is possible. We’re going to devote our next article to this topic, including a breakdown of our recommended method, little-known facts about metal roof warranties, and an installer horror story!
Thanks for reading, and good luck out there!
2 replies on “Mind the Gap – How NOT to Install Solar Animal Guard”
great content, keep up the good work!
Thanks Gabe – you taught me everything I know! I heard you’ve moved over to the commercial world – will have to pick your brain about tool ideas sometime.