Protecting your solar installation from birds and other pests is essential, even on standing-seam metal roofs where critter problems might seem less common. Here are some tips we’ve learned from our own experience as well as that of our professional installer customers.
Key Considerations for Critter Guard Installation on Metal Roofs
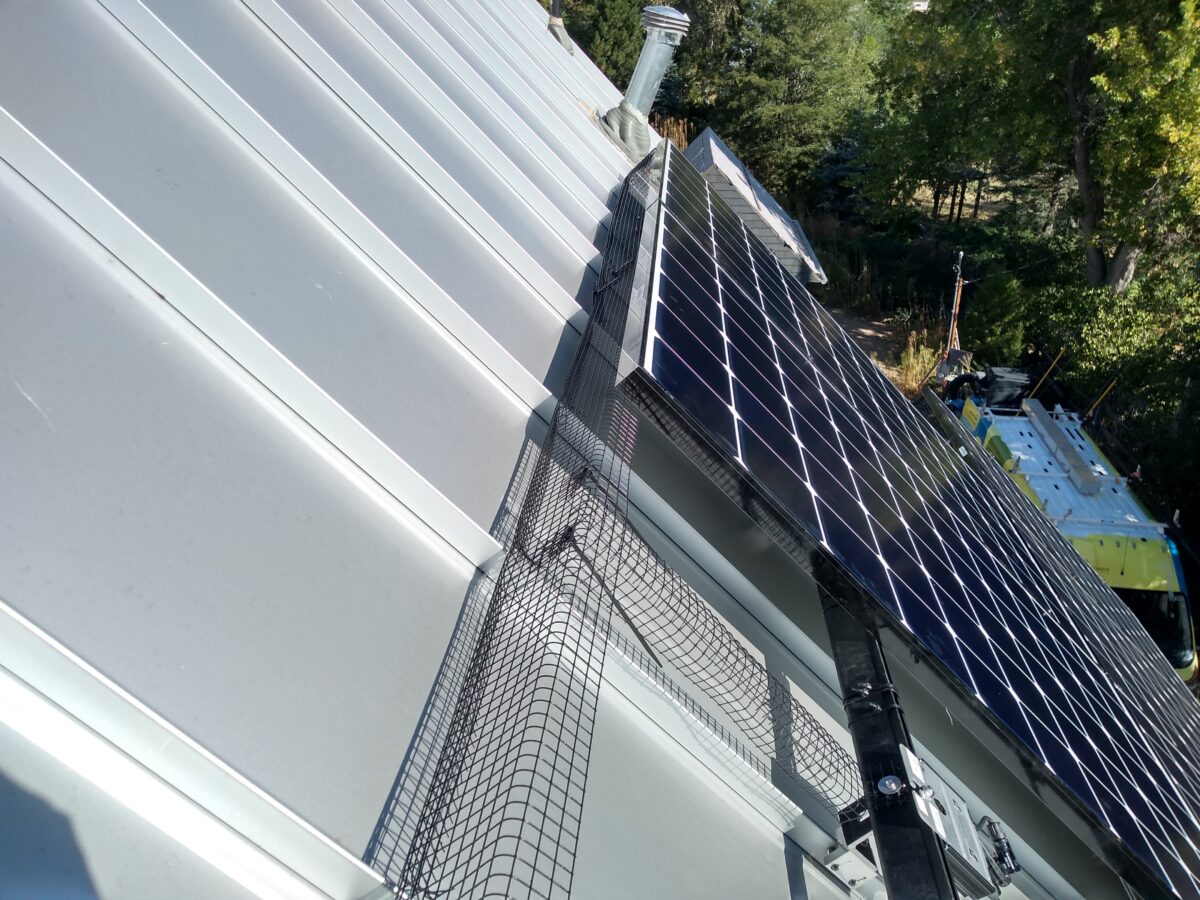
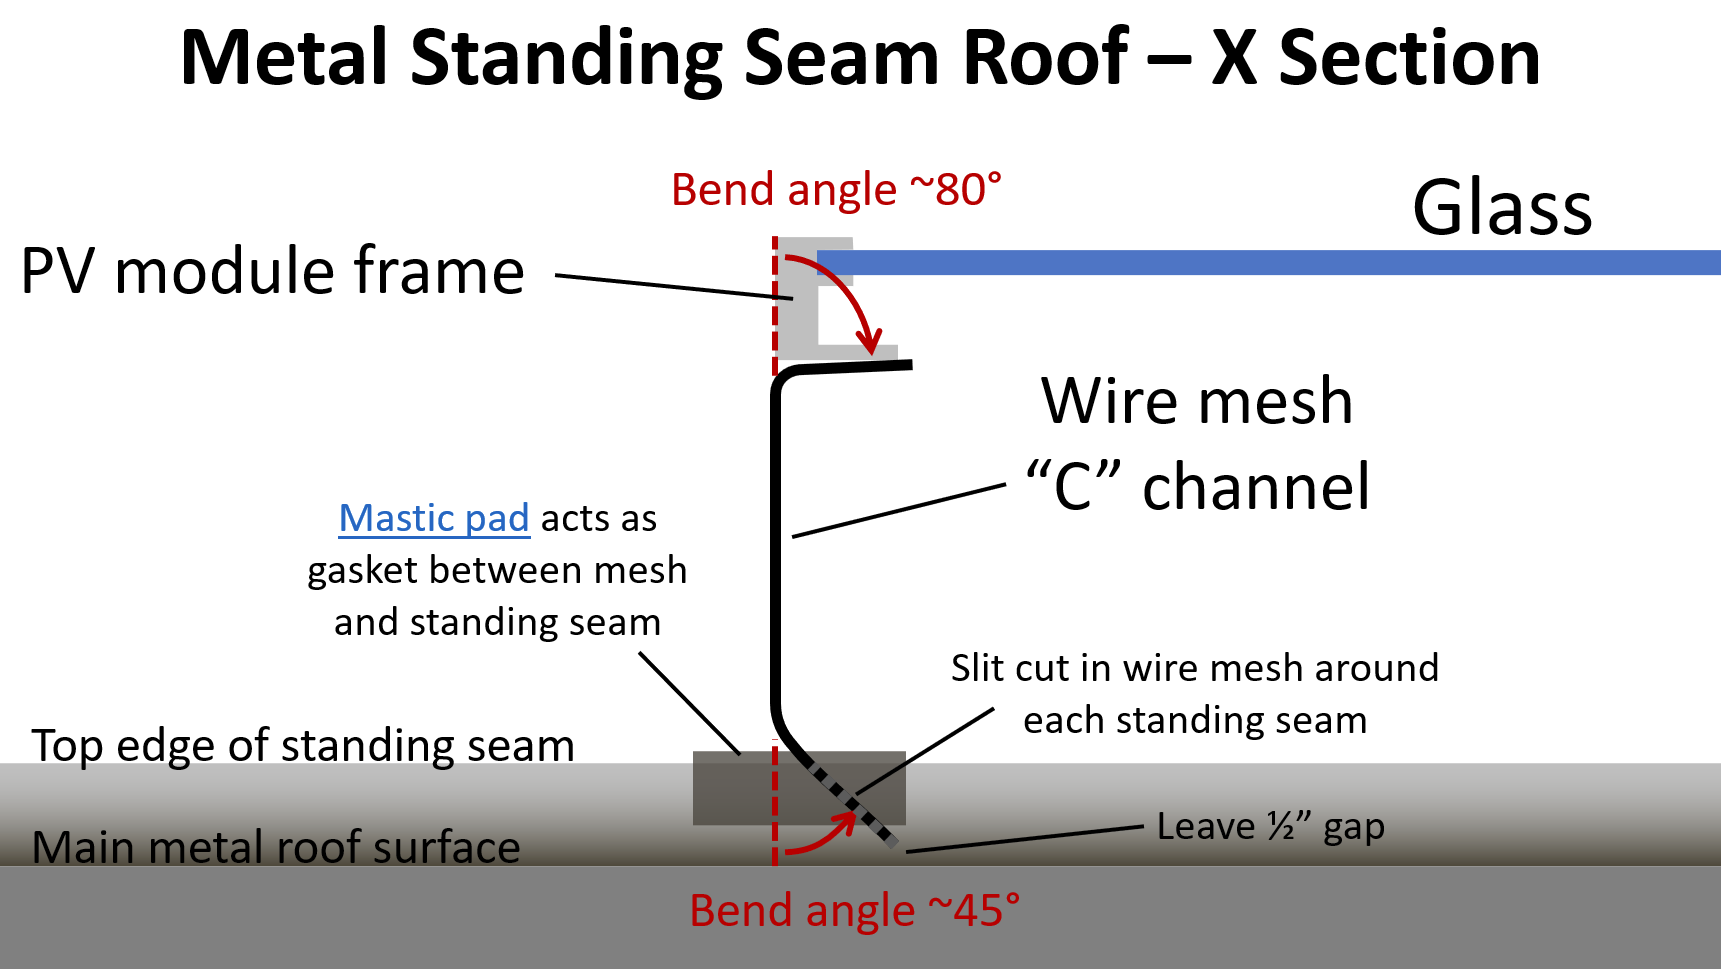
Avoid Direct Metal Contact
Here’s why:
- Scratching: If wire mesh is allowed to contact a painted metal roof, it will likely create clear scratch marks on the paint over time no matter how carefully it was installed. Remember the mesh and roof are expanding and contracting in the heat and getting blown around by the wind. This may be a big problem, even if the scratches are only cosmetic. We’ve heard a horror story of a 50 kW residential PV system which was installed with animal guard, only to have the angry homeowner demand that the guard be removed and every inch of scratched roof be sanded, primed and repainted.
- Warranties: Metal roof manufacturers typically offer warranties that are voided in the specific areas where the roof surface is contacted by another object. So if your wire mesh rests on the painted roof surface for a few years and a leak develops in that exact spot, it’s your problem.
- Noise: If animal guard is allowed to touch a metal roof lightly – meaning it is not firmly compressed in place – it may make an annoying squeaking/scratching noise when blown around in the wind. We know an installer who was called back by a homeowner to remove the animal guard for this reason.

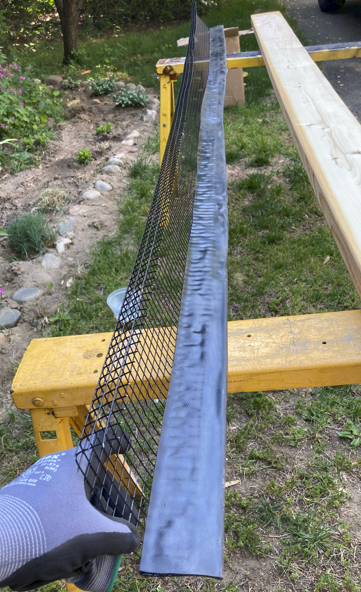
Use Protective Padding (Mastic/Butyl Pads)
- To prevent the issues above, place mastic or butyl pads where the mesh contacts the roof. This approach provides a protective barrier.
- While using a continuous strip of mastic tape is most secure, it is expensive and time-consuming. A more budget-friendly alternative is limiting roof-to-fencing contact to the tops of standing seams, and placing pads only at those contact points (more on this below).
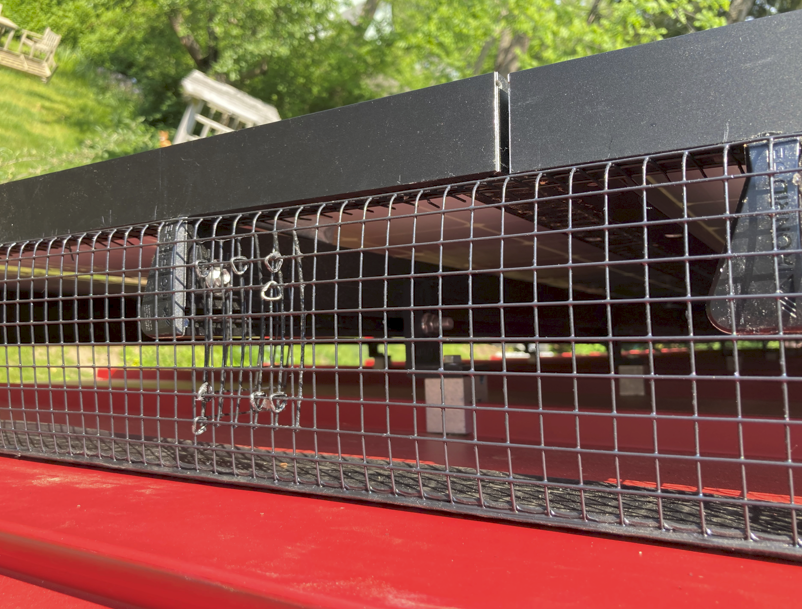
Create a C-Channel Shape
- Rather than leaving the mesh flat, bend it into a C-channel shape extending almost to the roof’s surface between seams. This design significantly increases rigidity, stability, and prevents easy displacement from wind or snow.
Cut Notches for Standing Seams
- Cutting notches into the mesh around each seam ensures a snug fit and maintains mesh integrity without creating gaps that could allow critters or debris to enter.
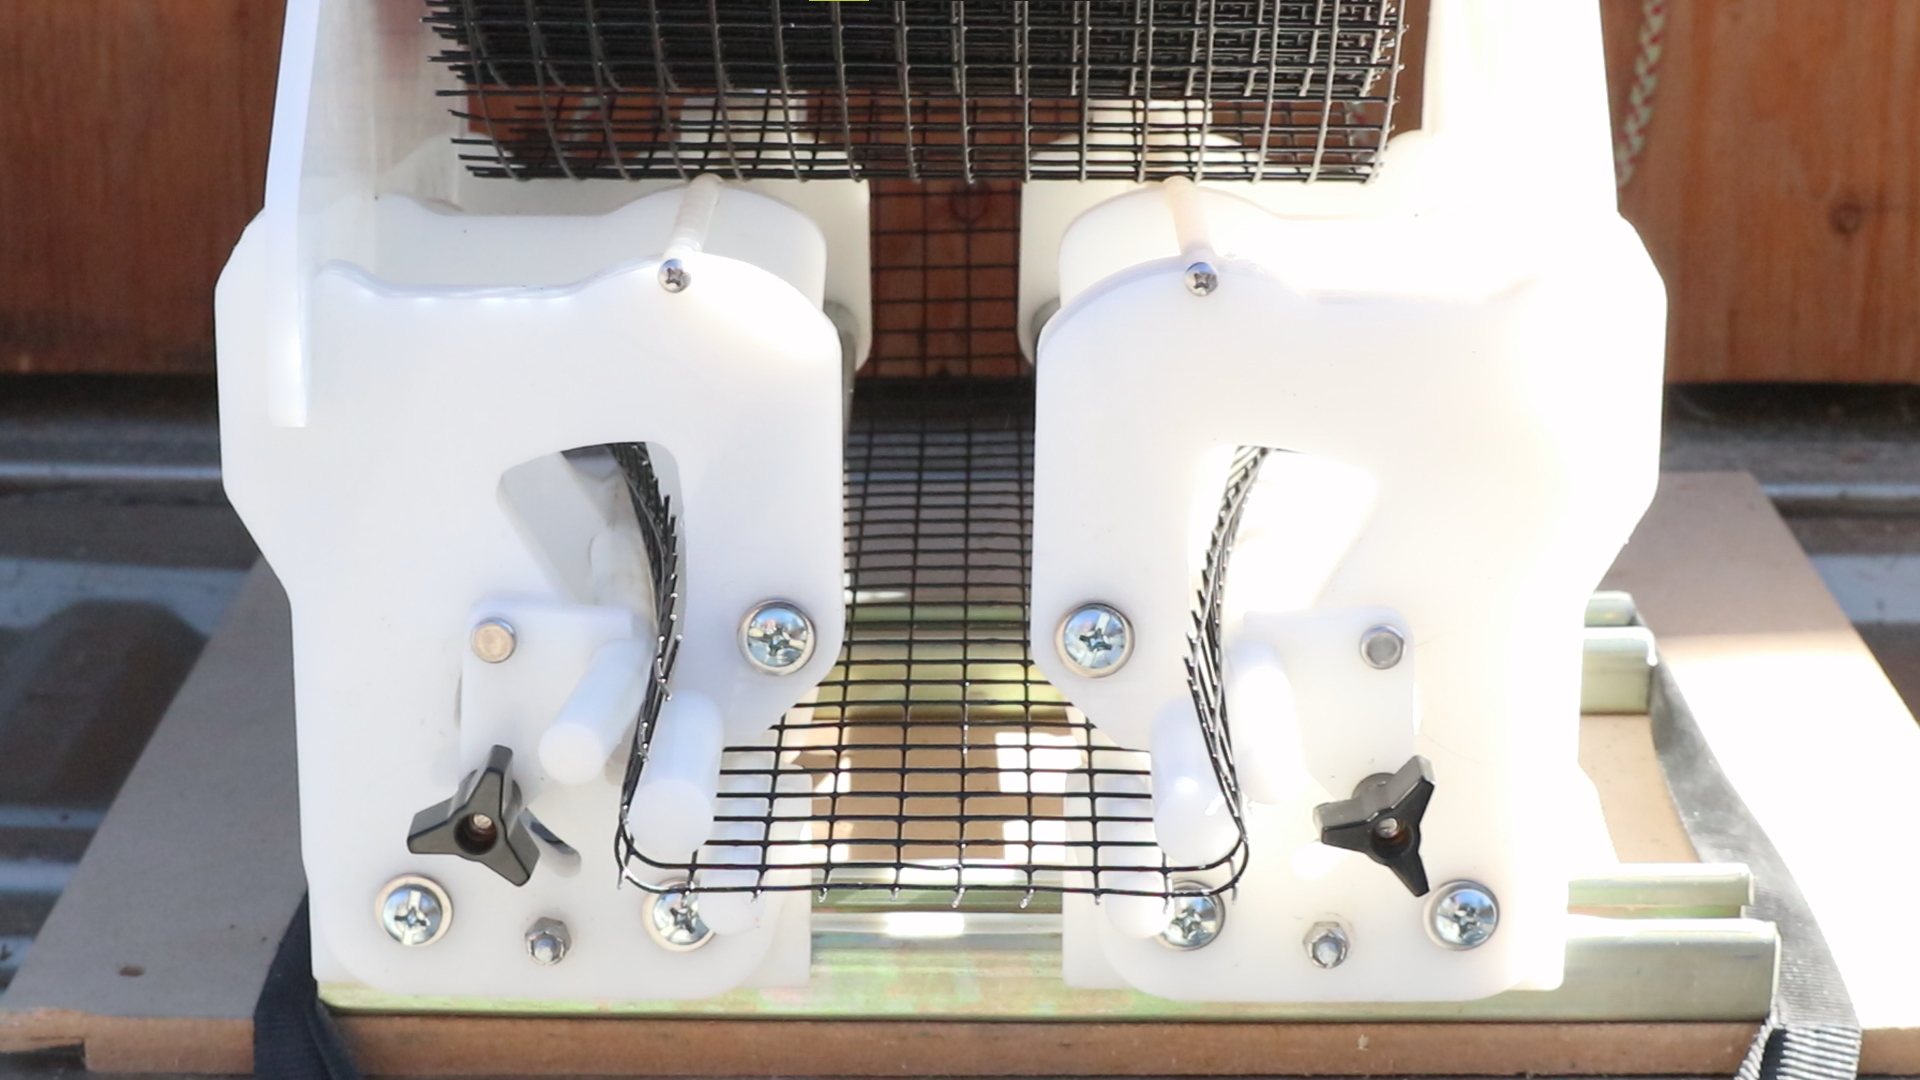
Consider the Rail Mount Method
- Where possible, using the Rail Mount Method is recommended, especially on upper horizontal edges susceptible to snow loading. This technique attaches mesh directly to the racking/rails rather than the solar panels themselves, making future maintenance simpler. The wire mesh “returns” buttress the perimeter mesh at top and bottom edges, making it much less likely that mesh will be dislodged by snow or built-up debris.

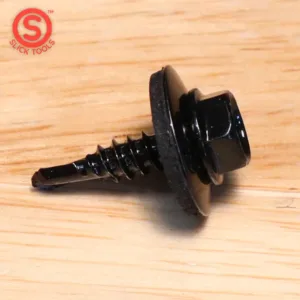
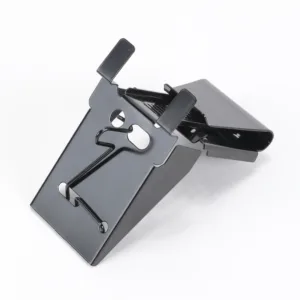
Attachment and Fasteners
- When using the Rail Mount Method, self-tapping screws with a fender washer are all that is needed. When attaching your mesh to the solar panels directly, look for a specialized clip such as CritterBlok which fully supports the mesh. J-clips are not recommended, because they rely on pressure between the roof and wire mesh (which you’re trying to avoid to prevent scratching).
- To attach sections of wire mesh to each other, use metal fasteners like hog rings or stainless steel cable ties. Avoid plastic zipties, as they break down quickly in the sun.
By following these recommendations, you’ll achieve a durable, effective installation that safeguards your solar system from unwanted critters without compromising the integrity of your metal roof.