
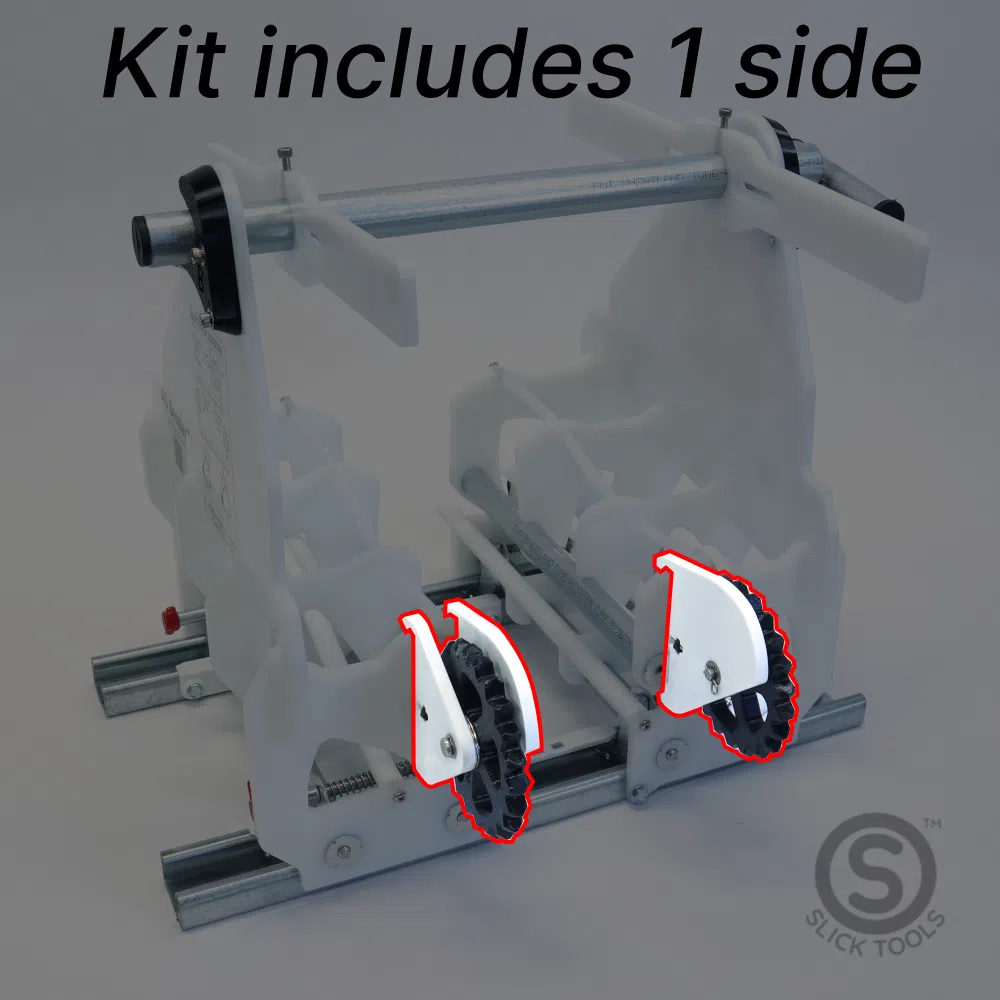
Description
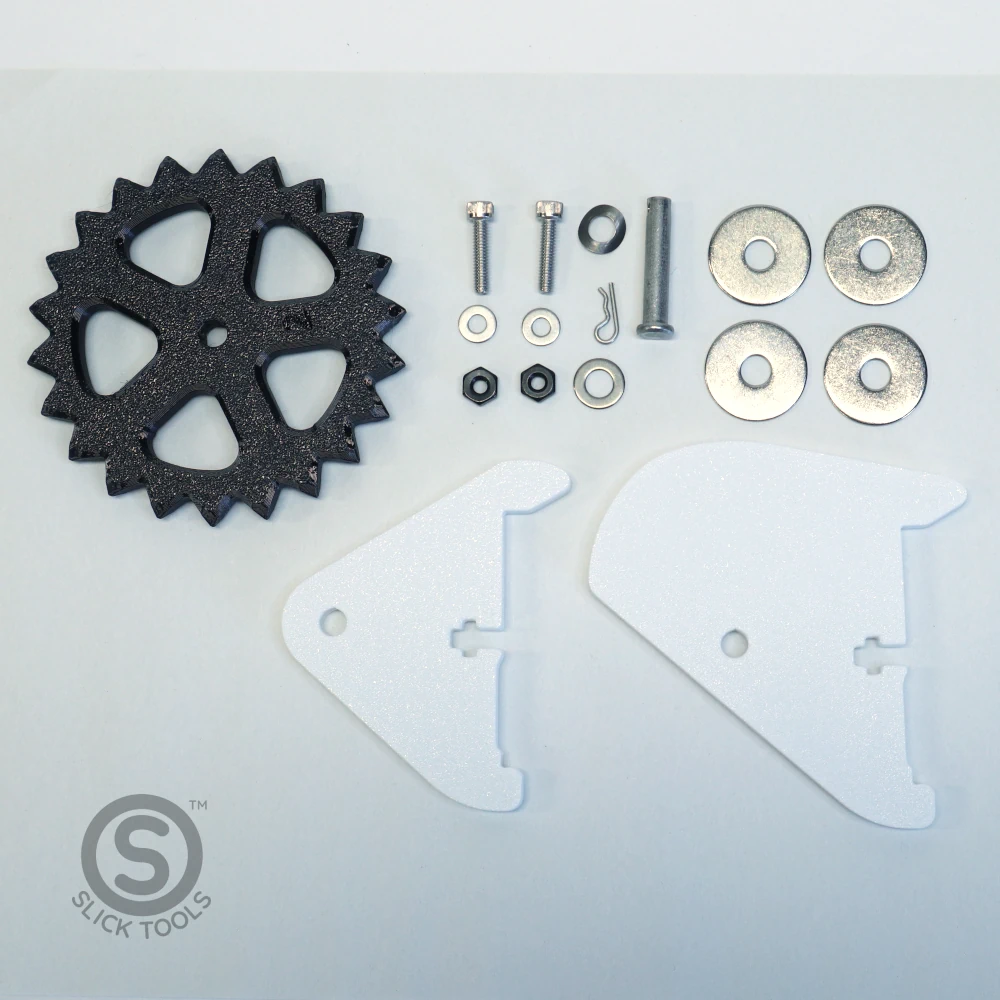
Sprocket, bracket and hardware which help guide wire mesh into the Bender. One kit includes a single sprocket and associated parts; two kits required to replace both sprockets on a Bender. Can be used on either side. Attachment hardware included. Fits AG Bender model 7.5 and up. Click here for help identifying your AG Bender model.
Click/tap photos to enlarge. Click thumbnails or swipe photo left/right to see other photos.
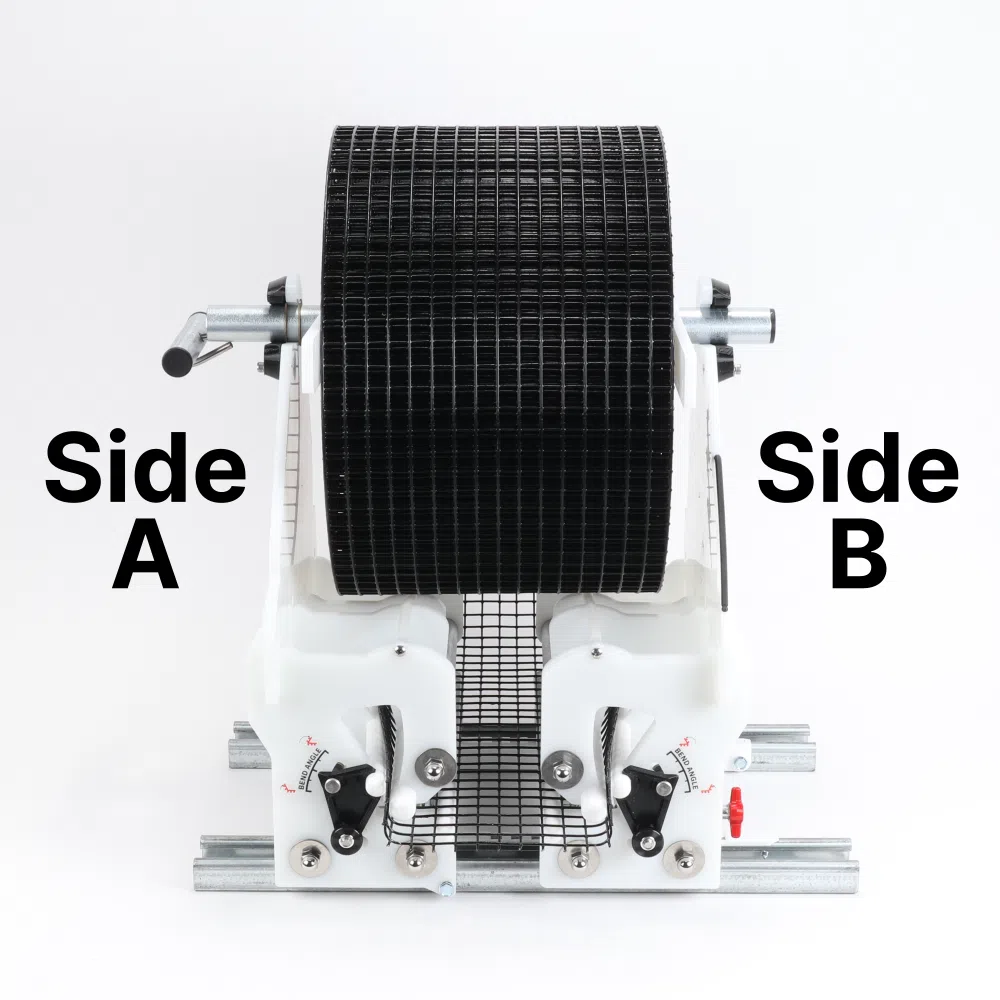
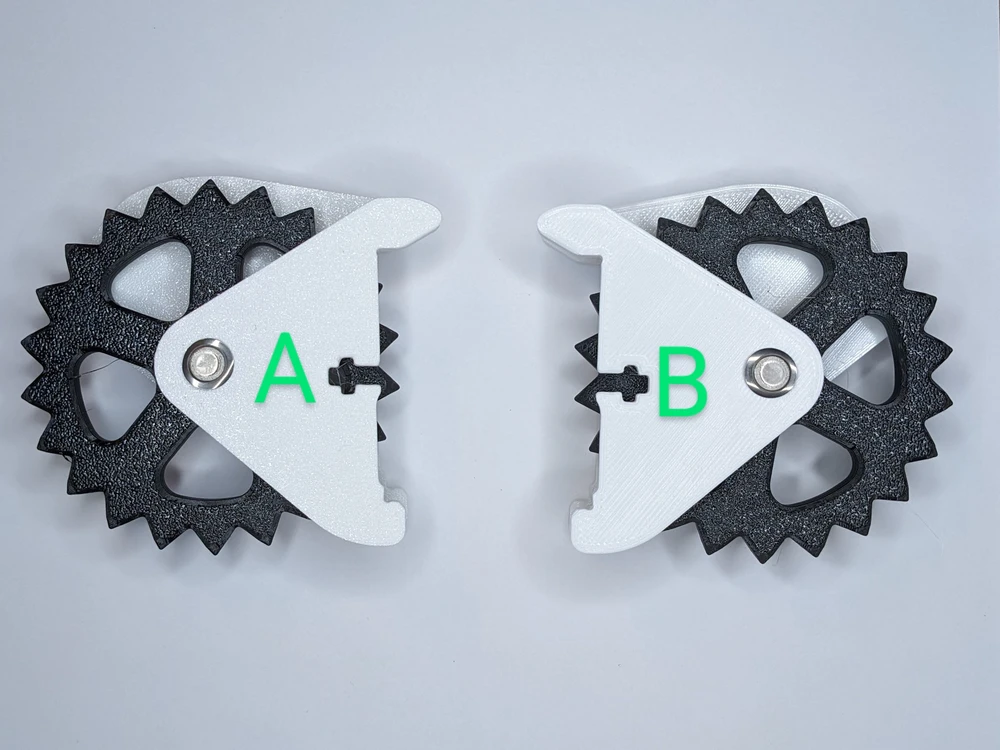
Step 1: Determine Side
- Determine which side of the Bender you will install the sprocket on.
- Side A and Side B sprocket assemblies are mirror images of each other.
- The rest of these instructions show how to assemble Side A. If you’re doing Side B, everything should be flipped.
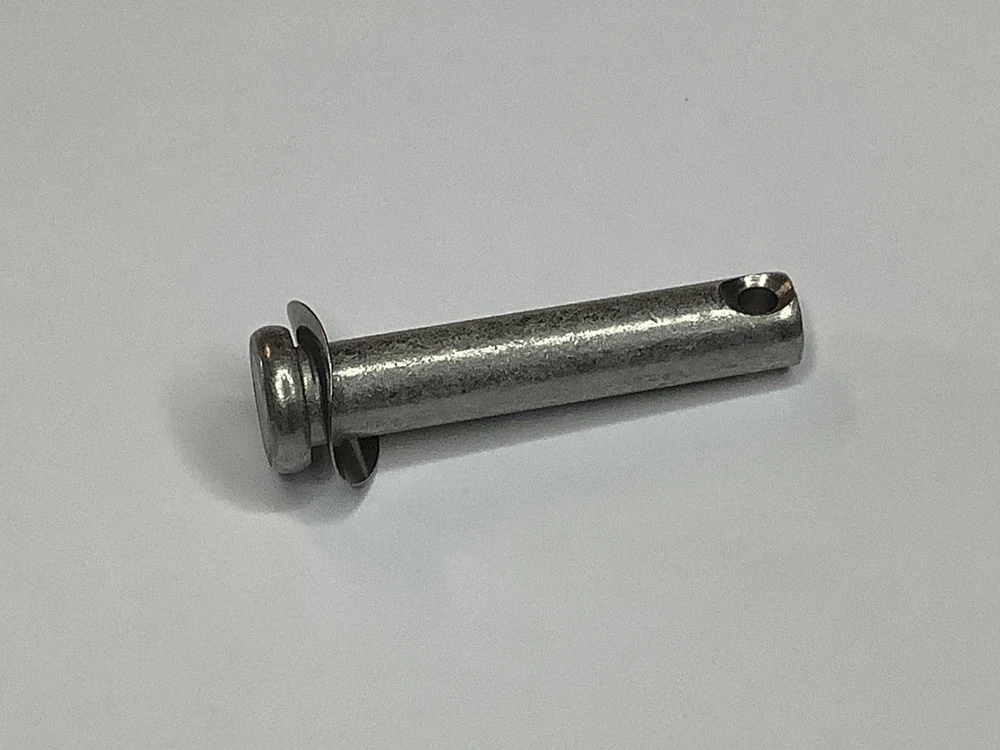
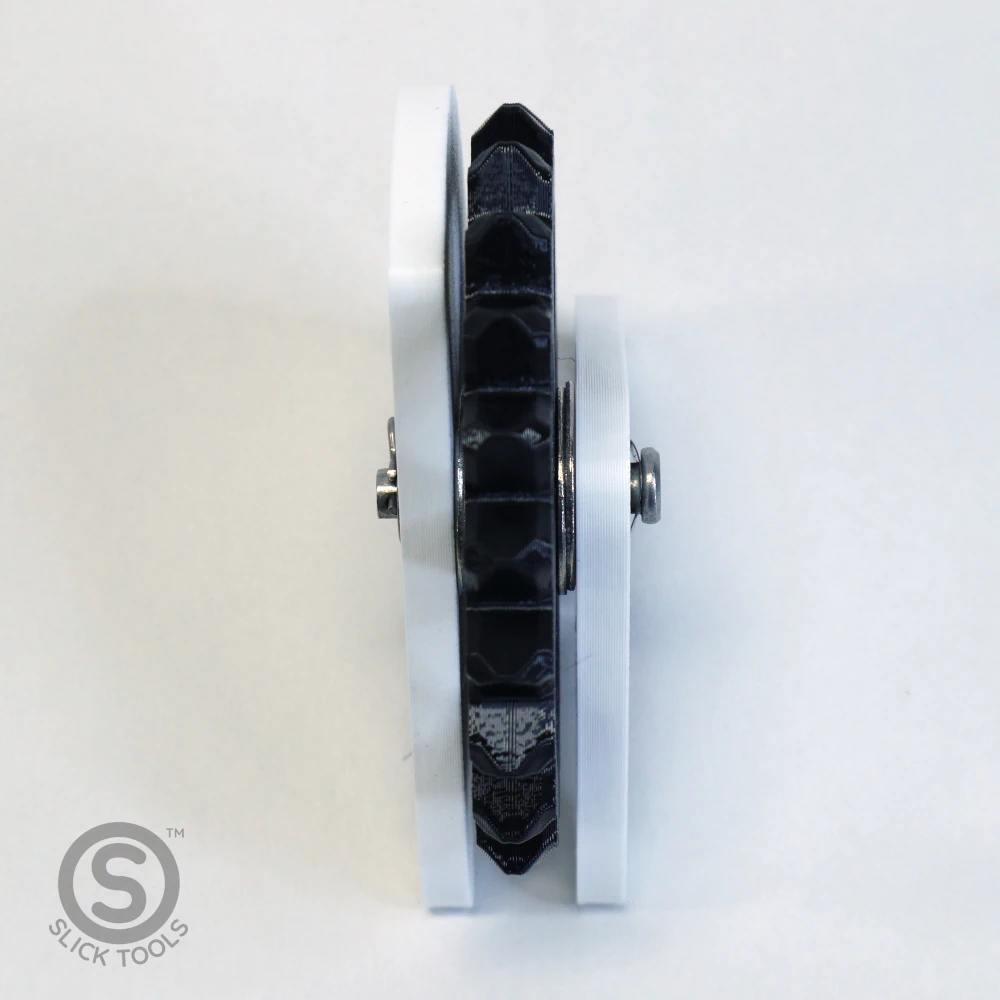
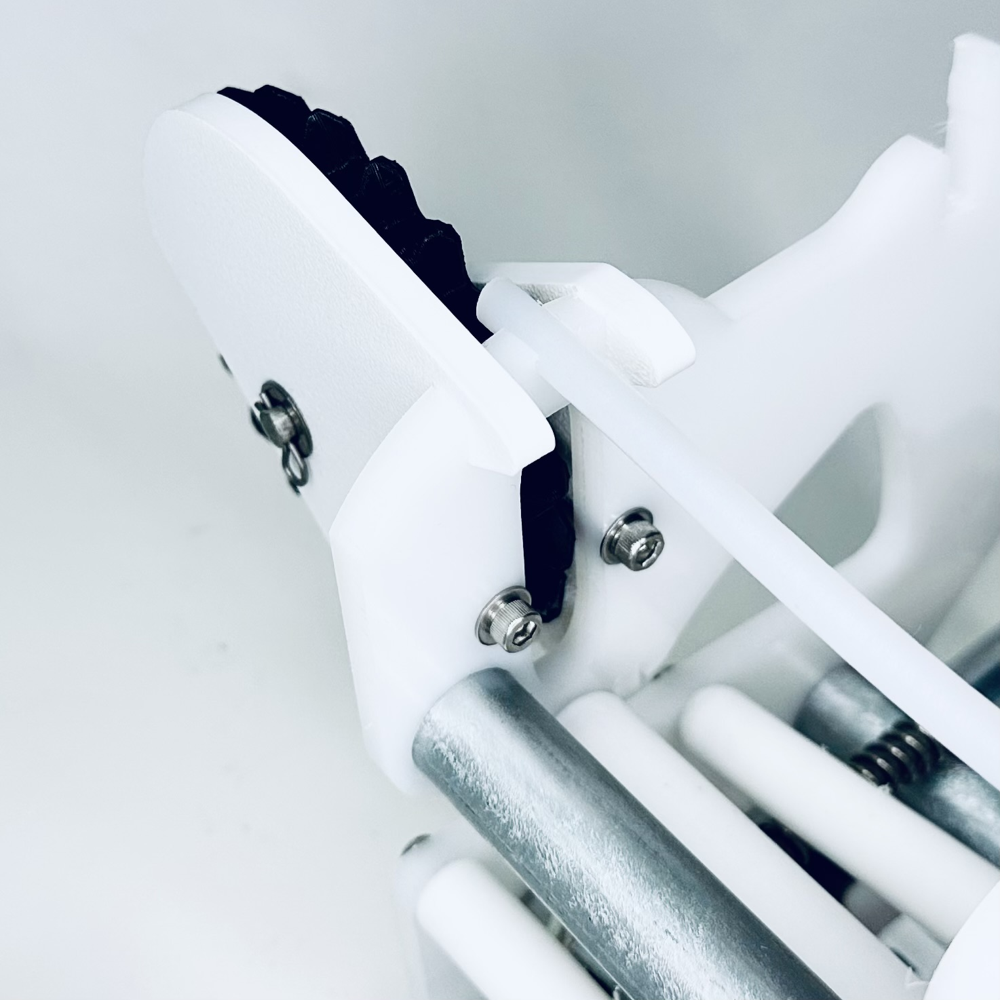
Step 2: Spring washer
- Slide the wave washer onto the clevis pin. The orientation of the washer matters; it should look just like in the photo (regardless of side A/B).
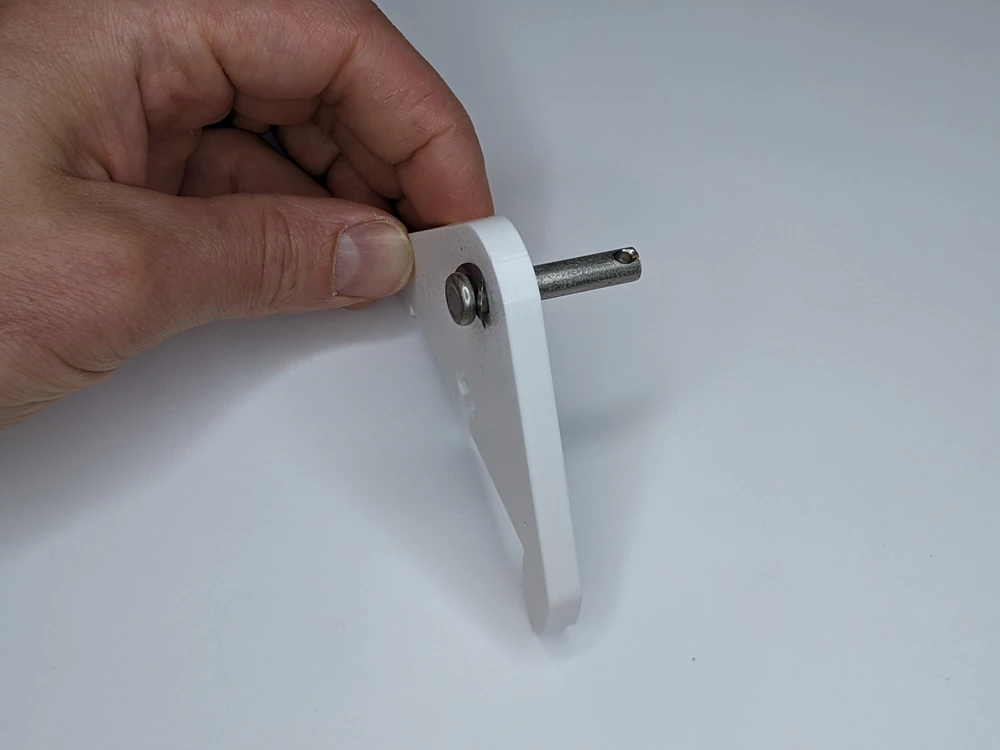
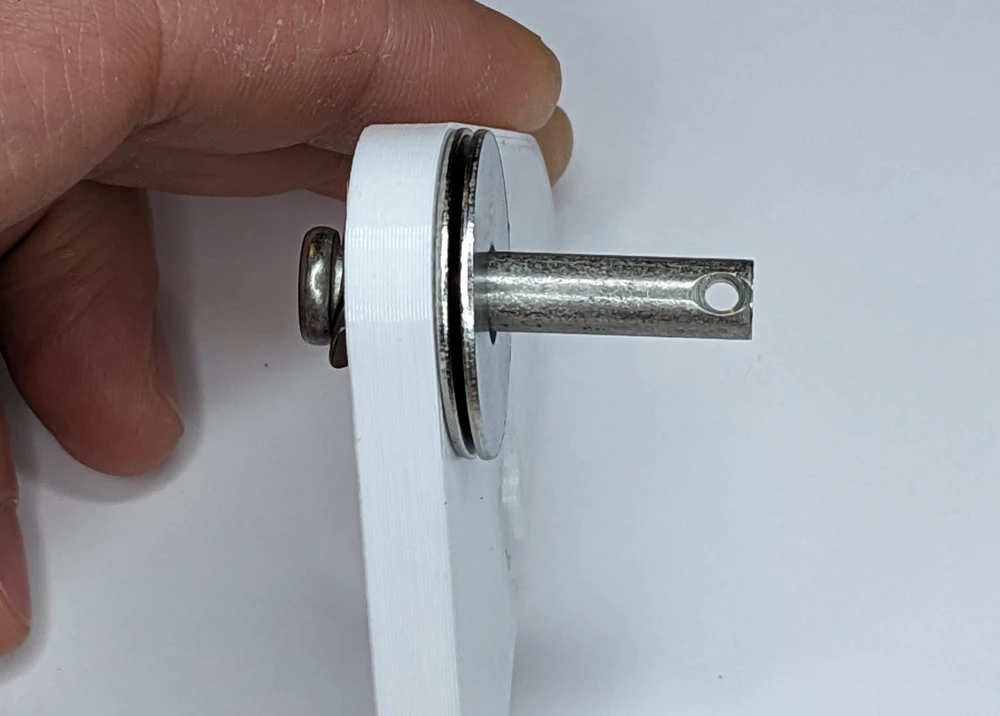
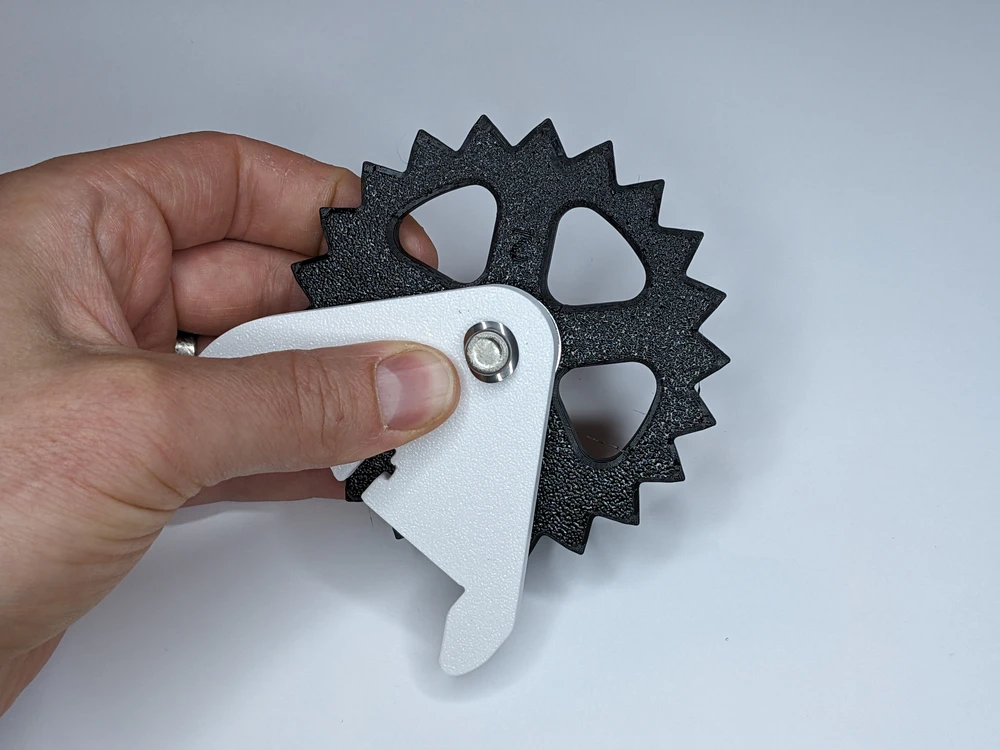
Step 3: Outer Sprocket Bracket
- Stick the clevis pin into the outer (smaller) sprocket bracket. If you’re assembling Side B, push it in from the opposite side as shown in the photo.
Step 4: Washers, sprocket, washers
- Add to the clevis pin in order:
- Two big washers
- Sprocket (orientation doesn’t matter)
- Two more big washers
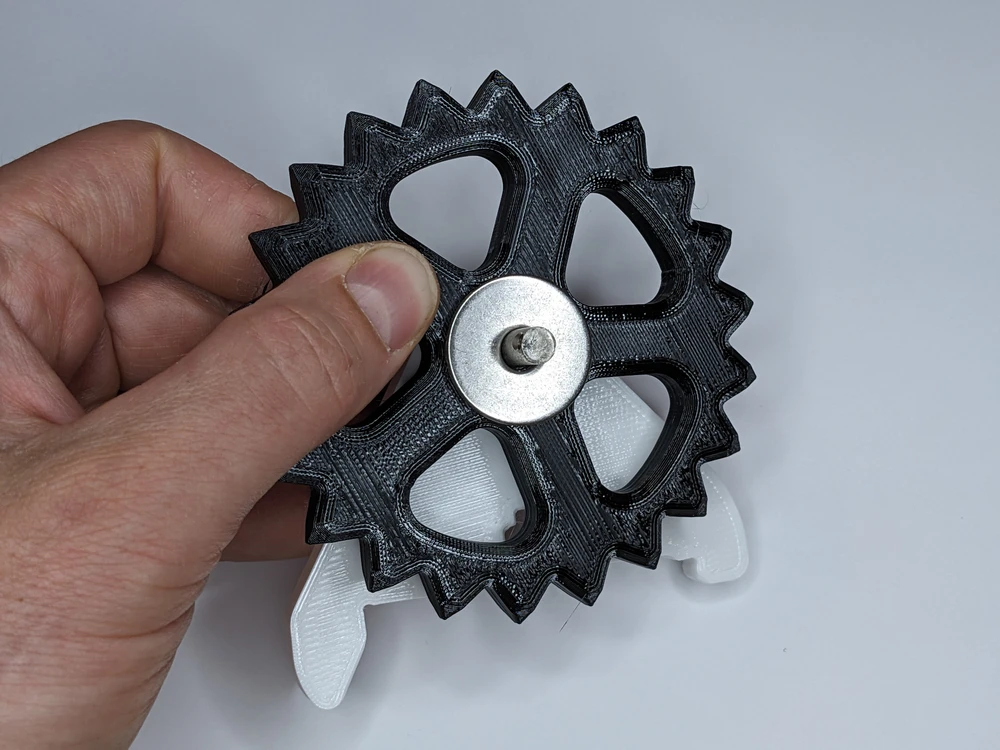
Step 5: Inner Sprocket Bracket
- Slide the inner (larger) sprocket bracket onto the clevis pin. Note the two tabs of the sprocket brackets are aligned.
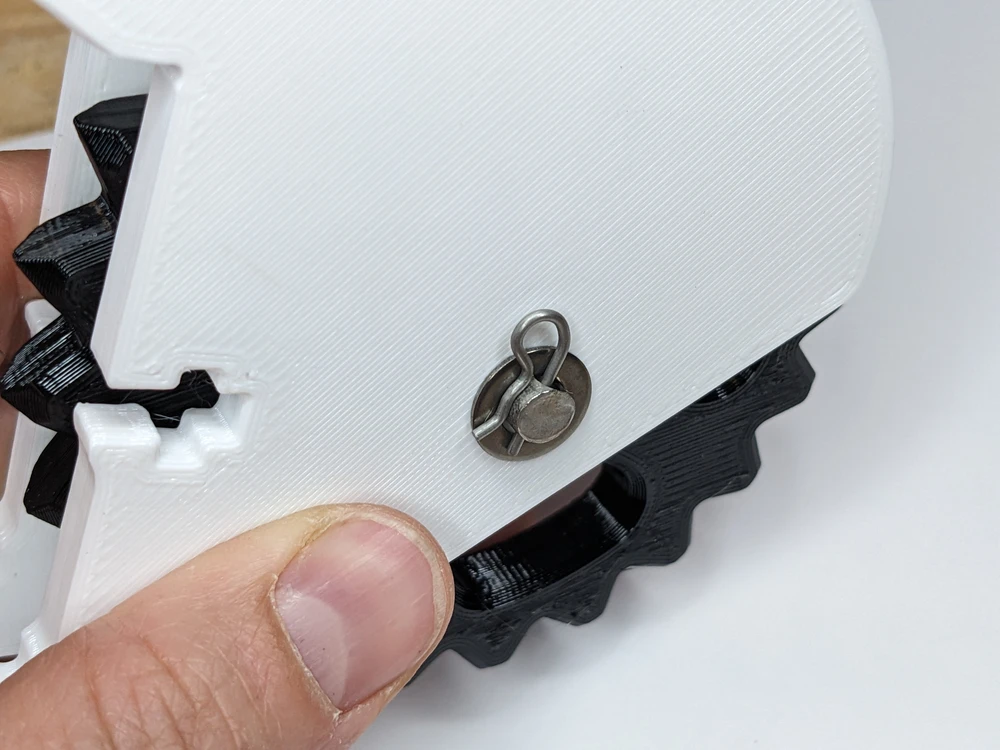
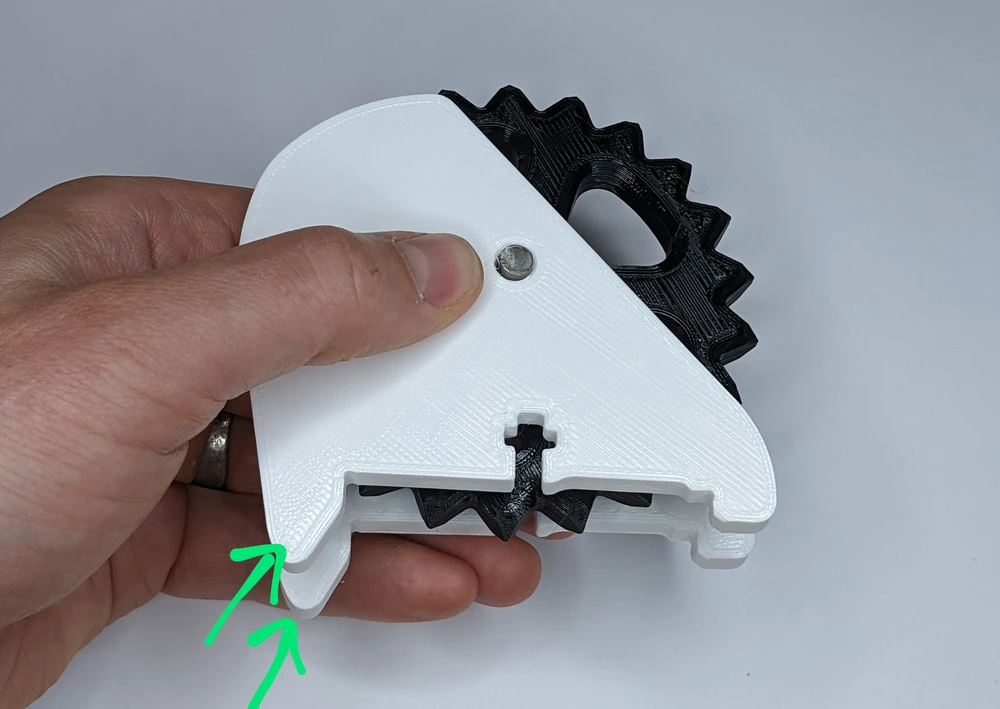
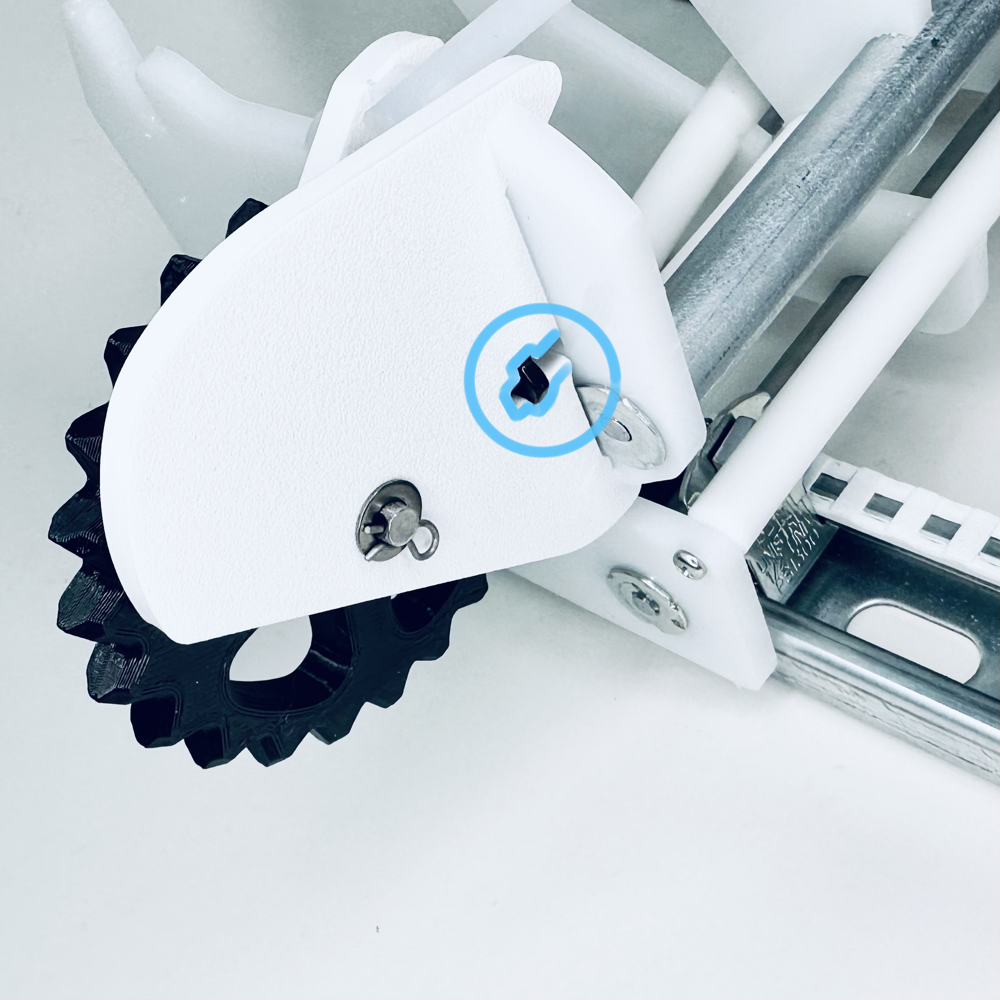
Step 6: Final washer & cotter pin
- Grip the assembly and squeeze the parts together so that the spring washer is compressed, and the end of the clevis pin sticks out.
- Put a small washer over the end of the clevis pin.
- Stick a “hairpin” / cotter pin through the hole in the end of the clevis pin. This holds everything together.
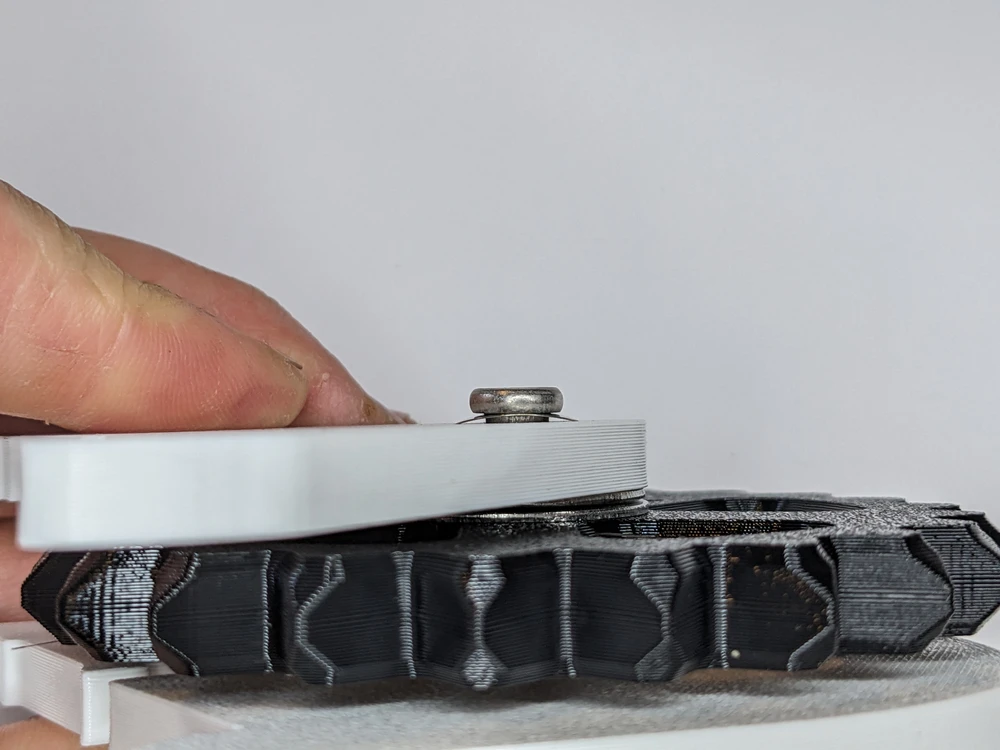
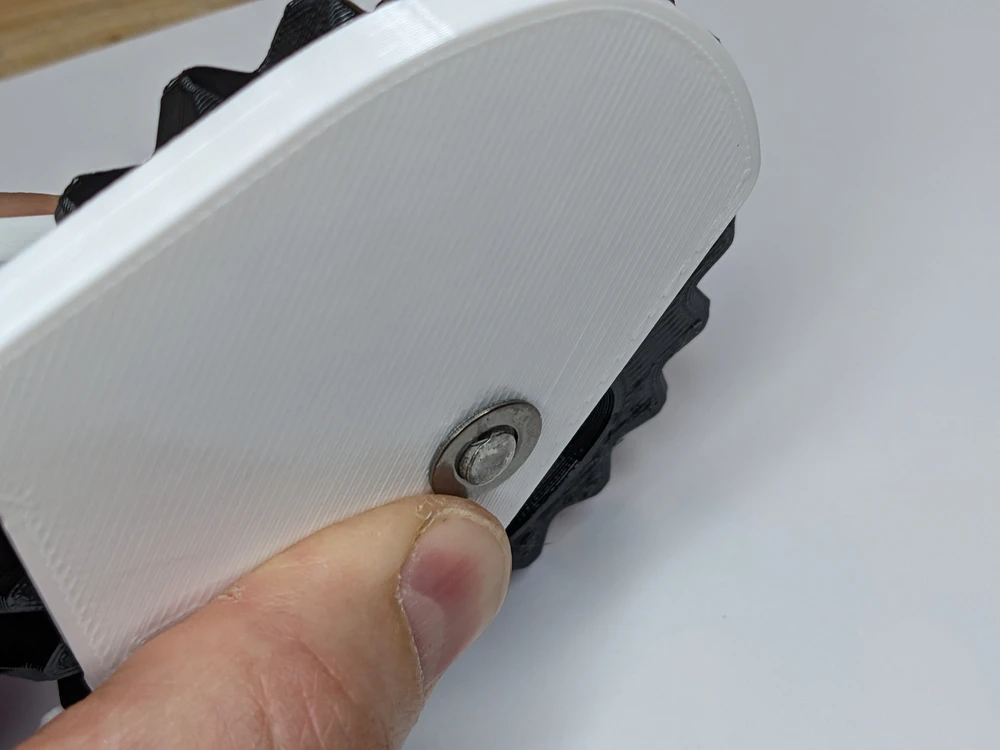
Step 7: Adjust compression
- Check the compression of the spring washer. It should be slightly compressed, allowing the sprocket to spin with no play, but no unnecessary friction. Add or remove small washers under the cotter pin to dial in the pressure if necessary.
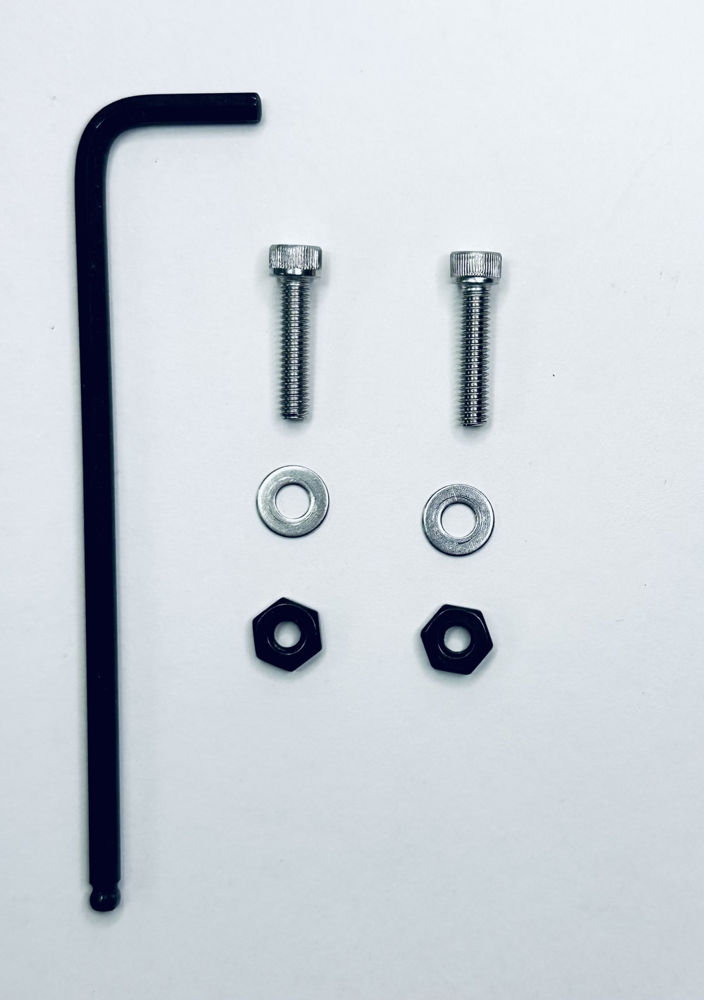
Step 8: Gather your fasteners and hex key
- You will now attach the Sprocket Bracket Assembly onto the bender.
- You were supplied two bolts, two nuts and two washers.
- You’ll need a 9/64 hex key (comes with AG Bender)
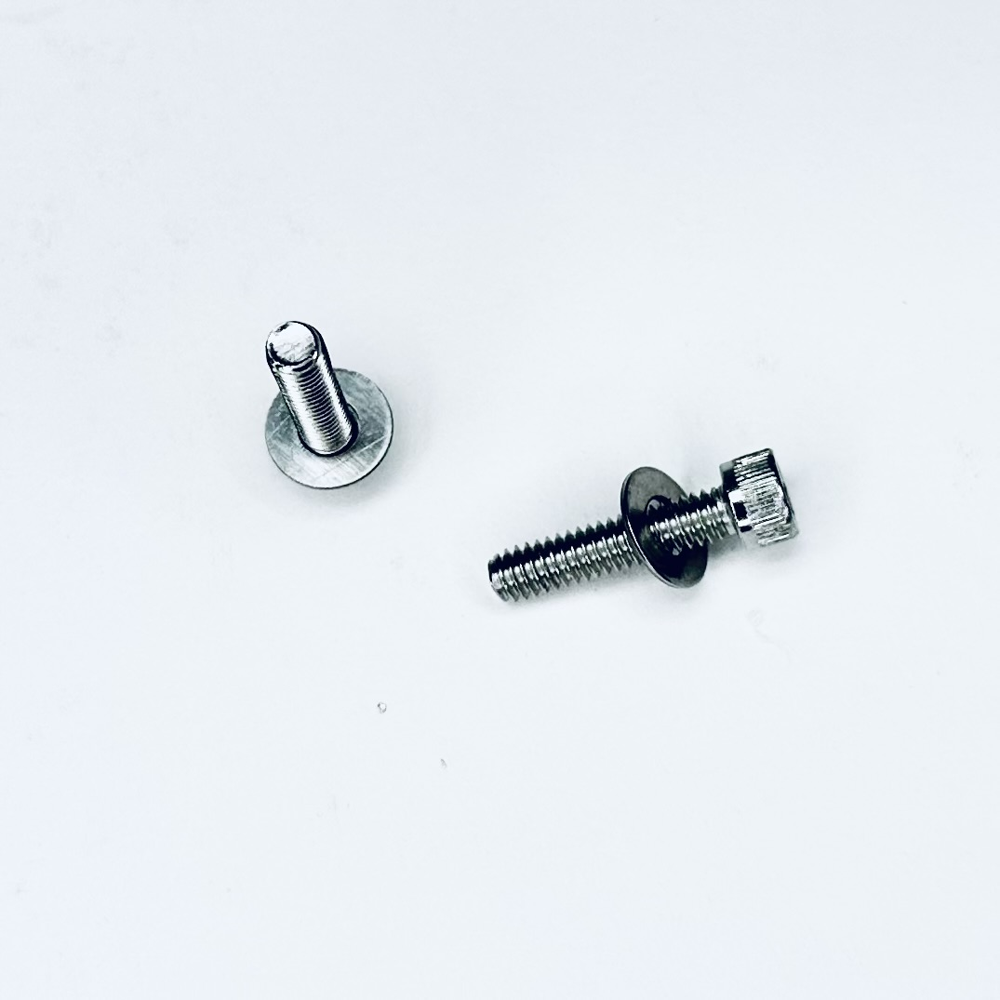
- Place the washer onto the bolts.

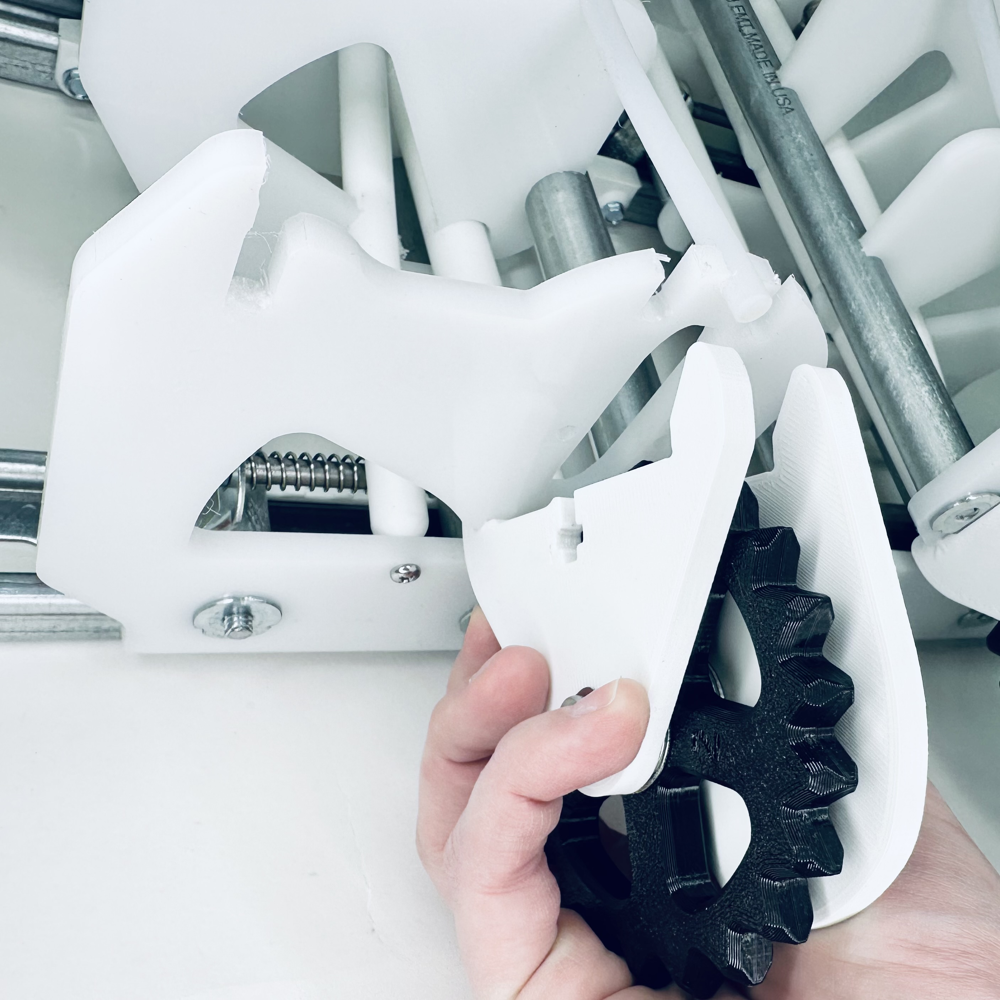
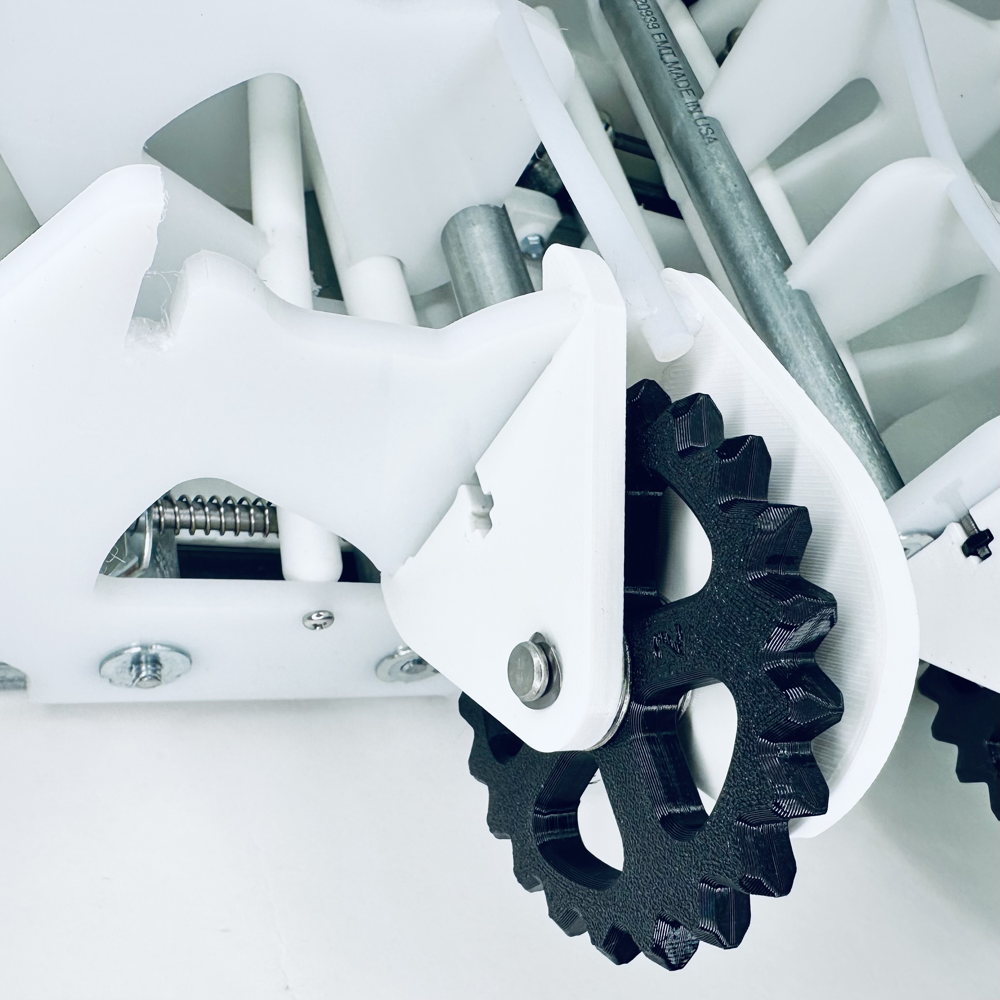
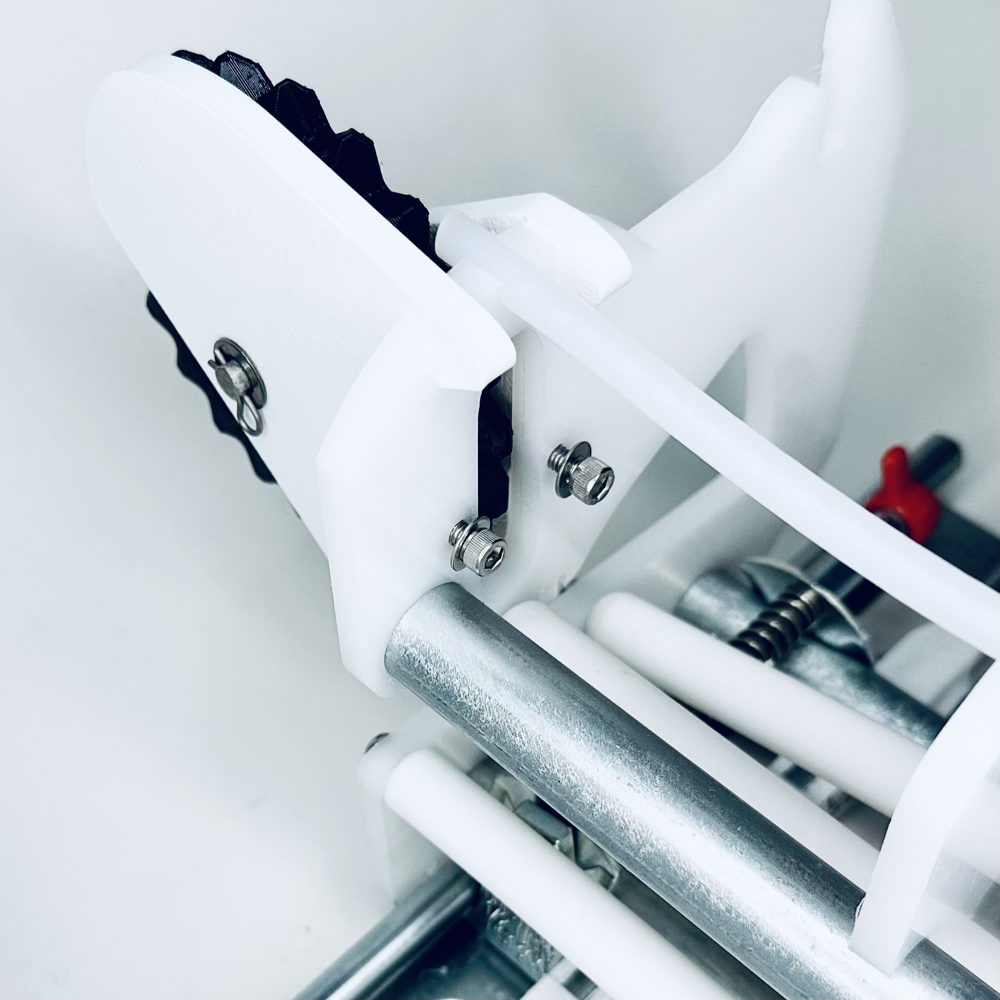
Step 9: Attach assembly to bender
- Attach your assembled sprocket to the bender.
- Take note of the large rounded side of the sprocket assembly. This will be on the inside and is intended to help guide the wire mesh into the machine.
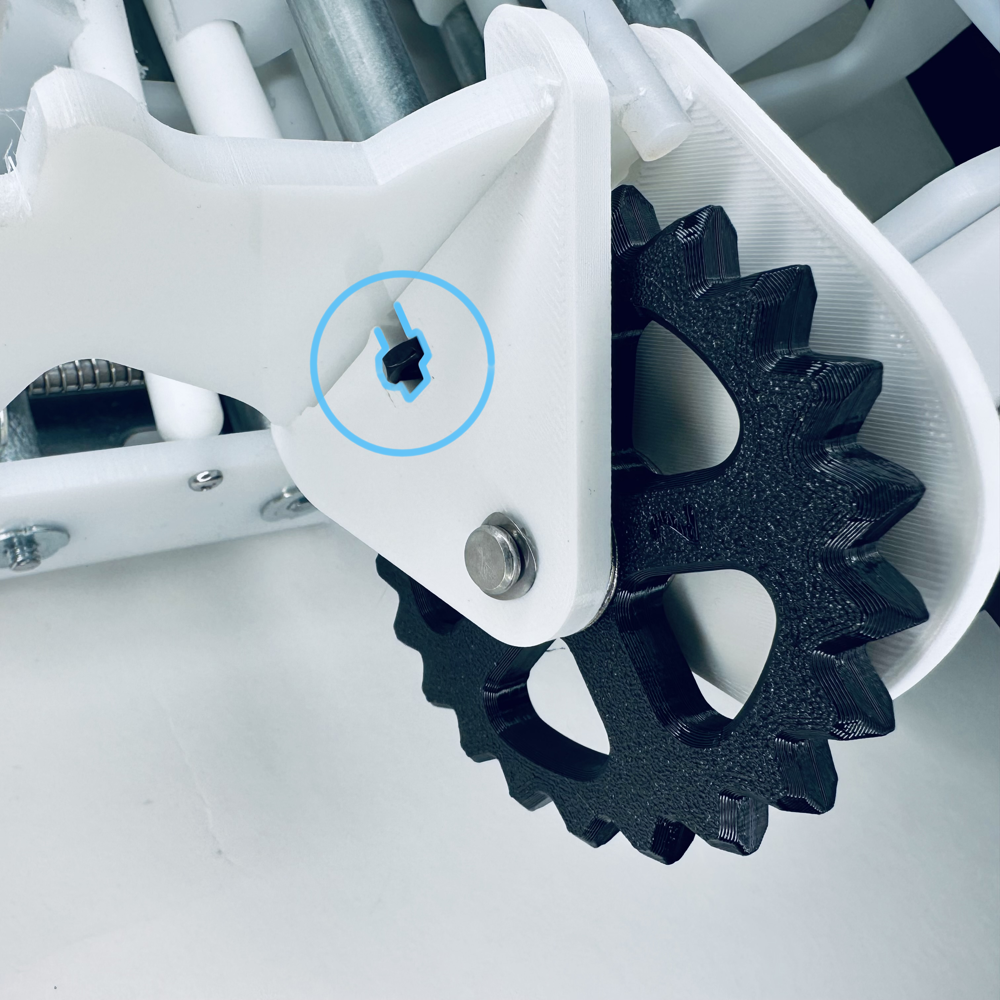
- Line up the lower/short pegs on the sprocket brackets with the slots on the Bender; insert. Then guide the long/upper pegs into the upper slots.
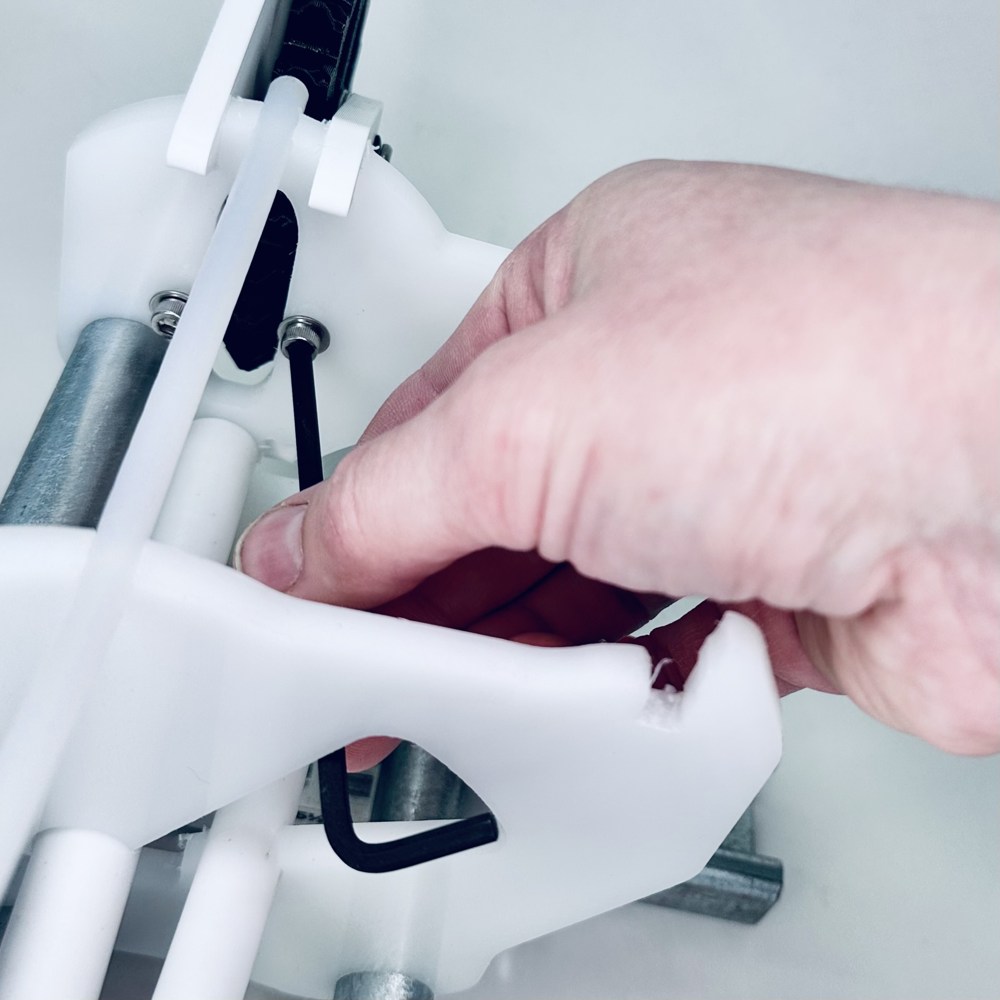
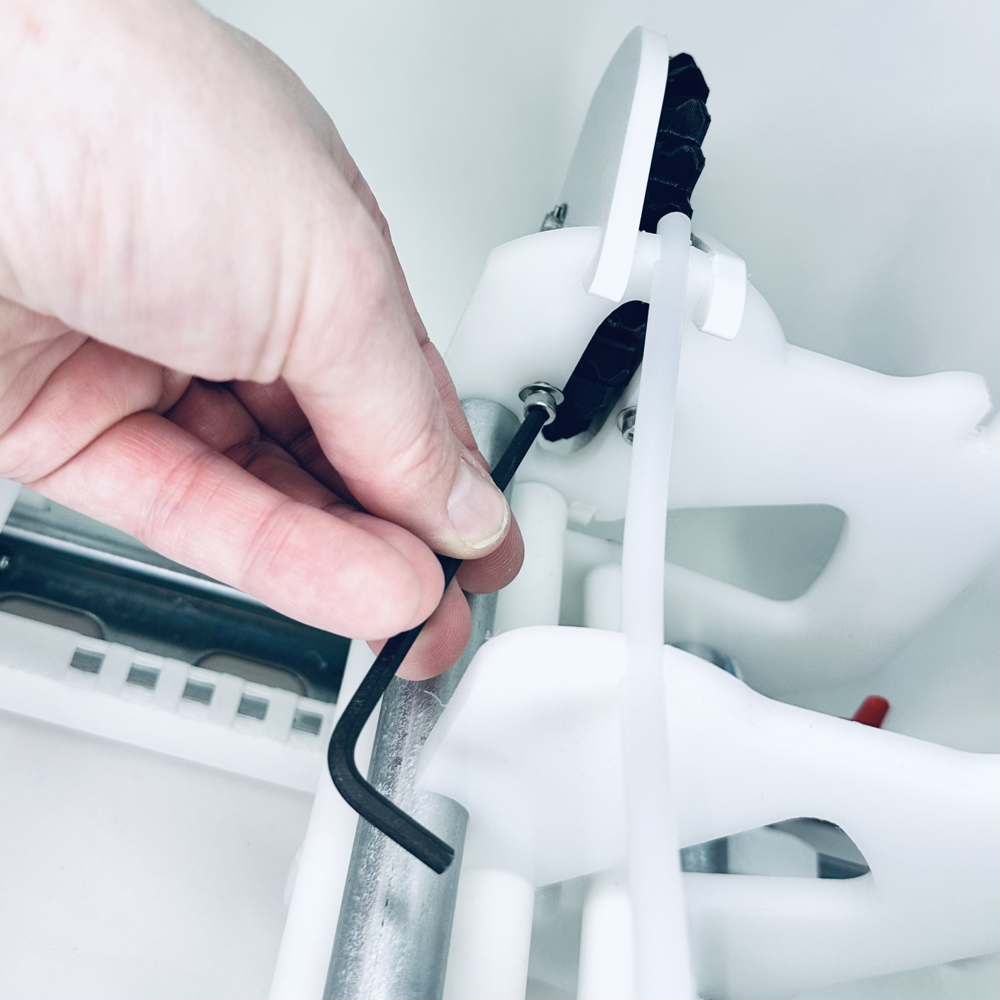
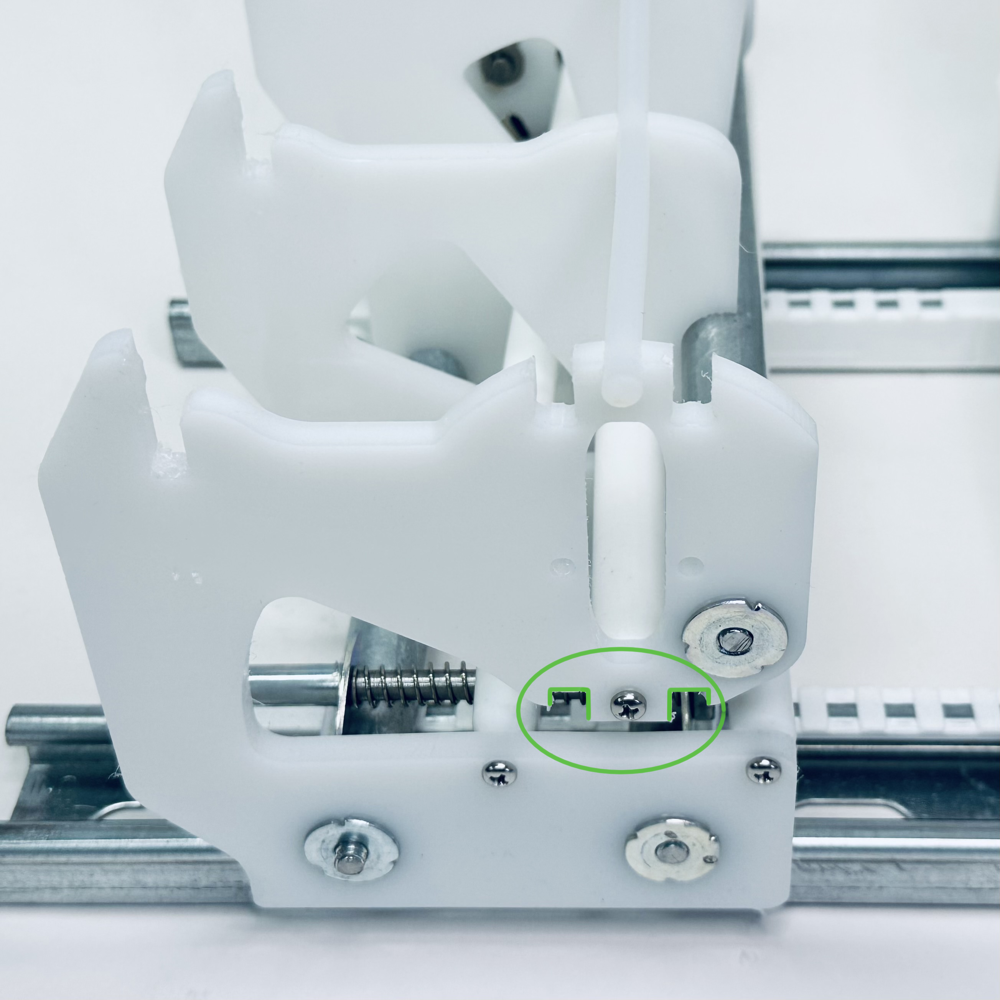
Step 10: Fasten the assembly to the AG Bender
- Insert the two nuts into the slots in each sprocket bracket
- Gently guide the bolts with the washers into the holes on the inside of the bender and tighten them with your fingers
- Use the ball end of the hex key to tighten both bolts until they’re snug. You’re done!